Showing posts with label #Customerappreciation. Show all posts

Sunday, 16 July 2017

Crazy Crafters blog hop with Special Guest - Jay Soriano


Welcome back everyone 😊
Today I am joining the Crazy Crafters and we are all CASEing the wonderful works of the talented Jay Soriano of Mitosustampin


Such an honour to be hopping with this man!

CASEing is where we Copy and Selective Edit. 
You are currently here with Kim Oliver at this stage. I will have a list of all hop participants closer to the end of this post.
I have chosen to use a set that I have been wanting to break out for some time and just been lacking time to use it!
This is what I have chosen to CASE from Jay's blog


Aaaaand
Here is my project.

A Note For You

#KOCreationscards #customerappreciation #crazycraftersbloghop #woodcrates #woodwordsbundle #woodtexturesdsp #stampinup #rubberstamping #cardmaking #notecards

I used the same stamp set and wood textures DSP as Jay has done. 
I just changed up the layout 😊
As I have made 4 sets of note cards so far I have tried to take pictures so that each design has been captured at least once.


#KOCreationscards #customerappreciation #crazycraftersbloghop #woodcrates #woodwordsbundle #woodtexturesdsp #stampinup #rubberstamping #cardmaking #notecards

I do have quite a few more to create as I want to use these as my customer thank you gifts this month. I think they will be a neat gift and so very well appreciated too.
So I need to get cracking! lol

What do you think of the one with the vellum overlay?? I was impressed with that one too, going to add a few more of these to the mix later.

#KOCreationscards #customerappreciation #crazycraftersbloghop #woodcrates #woodwordsbundle #woodtexturesdsp #stampinup #rubberstamping #cardmaking #notecards

I used the Wood Textures DSP to create my crates with. I then measured how wide these little things were and made my cards accordingly.

Basics of Cards 

  • For the card base I used A4 Very Vanilla Thick card stock . 
  • I  measured 8.3cm - 3 1/4 " and scored down the length of the card. 
  • I folded this and trimmed off excess. 
  • I then marked and cut at 8.3cm, 16.6 cm and 24.9cm or 3 1/4, 6 1/2 and 93/4 inches. This gave me 3 square cards per A4 sheet.
  • I cut a few sheets of regular Very Vanilla card stock up for the card fronts at 7cm x 7cm (next mark after 2 3/4") and stamped the images you see.
  • I backed this onto pieces of Wood Texture DSP cut at 7.5cm square (3") and trimmed if required to even up edges.
  • The sentiments have been stamped in Chocolate Chip.


#KOCreationscards #customerappreciation #crazycraftersbloghop #woodcrates #woodwordsbundle #woodtexturesdsp #stampinup #rubberstamping #cardmaking #notecards

For the envelopes

It took a couple of goes to get the envelopes at the exact size I wanted but finally I worked it out. You may have noticed that a few seem a little larger. That is why hehehe.
  • I used A4 sheets of regular Very Vanilla card stock. 
  • I cut these into 14cm squares (5 1/4") (You can use the left over pieces for the card fronts)
  • Using the envelope punch board I scored the first score line at  7cm (2 3/4") and then repeated the steps as directed on the punch board.
  • This gives an exact fit that also sits nice and snugly inside the crate too.

To continue through this amazing hop please click the name after mine.


If you are looking to purchase any of the items I used to create my projects with then please use the carousel below.
It has all of the items listed and is linked directly to my store.
When shopping with me don't forget to enter the Hostess code for July


Thank you so much for visiting with me today. I hope you found some inspiration along the way. 
If you have any questions please use the comment section below. 
I always reply.


Sunday, 7 May 2017

Crazy Crafters Blog Hop with Lea Denton

Welcome back crafty people..
Today the CC's team are hopping with special guest Lea Denton


We have all chosen a project of Lea's to CASE (copy and selective edit) You are currently here me Kim Oliver. I will have a list of names near the end of my blog of the other participants.

Here is the project I have chosen to CASE


With the card above Lea chose to colour some of the Irresistibly Floral embossed DSP.
 As this gorgeous DSP is retiring soon and I have a nearly a full packet in stock I needed to make use of it!
Plus I love the simplicity of this design!


Here are my cards inspired by Lea's.

'All Things Thanks'

CAS (Clean And Simple)
#KOCreationscards #ImbringingRAKcardsback #Stampinupframelits #Watercolour #Techniques #Allthingsthanks #Customerappreciation #CAS

I ended up making 12 cards in total.
Some for customers plus RAK cards too using this simple yest striking design.
I only used two small pieces from my pack and they were off cuts at that!!
The stamp set that Lea and myself used for the sentiment is called 'All Things Thanks'

It is perfect for a bold sentiment
You can see some differences from Lea's card to my set, with the addition of the black layers and bases.
I also added some black die cut images from differing sets as accents to co-ordinate with the bold black sentiments.

#KOCreationscards #ImbringingRAKcardsback #Stampinupframelits #Watercolour #Techniques #Allthingsthanks #Customerappreciation #Loveitchopit #CAS

This card above has the Dahlia from the May Flower Framelits set.


The ink colours that I chose to brush over the DSP were as follows
  1. Lemon Lime Twist (available singly on 1st June) 
  2. Wild Wasabi
  3. Pool Party
  4. Bermuda Bay
  5. Peekaboo Peach
  6. Flirty Flamingo
  7. Melon Mamno and
  8. Fresh Fig (Available singly on 1st June) 
My card base for these cards are Basic Black with a layer of Thick Whisper White on top.
The embossed Designer Series Paper is called Irresisitably Floral and is now retired. But fret not! You can make your own!! More info further down the page, just after the participant list 😇

I cut the the coloured DSP into strips and backed it onto the Basic Black card stock, leaving only a 2mm edge. 
To create a co-ordinating inside, all I did was add a layer of whisper white, so that there was a clean area to write a personal message on.


#KOCreationscards #ImbringingRAKcardsback #Stampinupframelits #Watercolour #Techniques #Allthingsthanks #Customerappreciation #Loveitchopit #CAS

I created 5 different cards just by adding a different focal accent using a die cut image in black. This one above has the dragon fly from Dragonfly Dreams


#KOCreationscards #ImbringingRAKcardsback #Stampinupframelits #Watercolour #Techniques #Allthingsthanks #Customerappreciation #Loveitchopit #CAS

This one has a single flower from the May Flower Framelits with the addition of the metallic sequins.


#KOCreationscards #ImbringingRAKcardsback #Stampinupframelits #Watercolour #Techniques #Allthingsthanks #Customerappreciation #Loveitchopit #CAS

I left this one bare and just added the metallic sequins in silver and black for a little bling. 
I love bling 😄


#KOCreationscards #ImbringingRAKcardsback #Stampinupframelits #Watercolour #Techniques #Allthingsthanks #Customerappreciation #Loveitchopit #CAS


 And this one has the small butterfly from Bold Butterflies Framelits and no bling.
I do hope you have enjoyed these cards today.
 Please keep moving through the hop by clicking on the name after mine. I hope you find some inspiration along the way 😍


As you can no longer purchase this DSP (Designer Series Paper) I have provided a link below for a video explaining how to create your own embossed paper to do the exact same emboss resist technique with!
How awesome is that!

Click HERE to view


If you are in search of some of the items I used to create this set then please look in the carousel below.
Don't forget the MAY Hostess Code if purchasing from me.

33EJUTN4


If you would like to be updated on special deals, hostess codes and even tutorials then sign up to my monthly news letter below.


Thank you so very much for visiting my blog today..
If you have any questions please don't hesitate to ask in comments below.
I always reply!

Monday, 24 April 2017

Special Reason Make and Take Class

Welcome back crafty people

I thought I would share with you all a class I held today in my home.

It was based around the retiring bundle 'Special Reason' 144720. It is currently still available. But I have no idea for how much longer. Go order this gorgeous bundle NOW by clicking HERE!
It, along with a couple of others is a definite favourite of mine and has been featured on a number of my cards.
I made a bunch of customer Thank You cards for my lovely customers. 
And then let them know that this is what they would be creating for their next class when I handed out their orders and cards.

Here are the  cards I made for them to show my appreciation.
I showcased this set of cards in a blog hop with Janneke around a month ago. 
You can see the card set HERE in more detail.

#Specialreason #Thankyou #Cardmakingclass #Customerappreciation #KOCreationscards #Workshops


I woke with a nasty but bearable headache this morning, which for me n ormally leads to migraine for a few days.... But so far, touch wood all is still a the bearable level!
I was feeling a little overwhelmed to start with this morning, as I knew my class was going to be larger than normal due to the school holidays. I normally only have around 8 people per class but today I had 3 young teenagers + a customers mum joining in. 
So, after rejigging the seating arrangements I managed to fit them all in  + I had a couple of spaces spare! Which was great as I had a drop in lol.
I also had the pleasure of hosting another Demonstrator and friend Kayla Renee MacAulay from the other side of my little island state.
Here is a quick shot of a couple of Kayla's cards made today at the class.

No automatic alt text available.


Here is my set up ready for the day.

#Specialreason #Thankyou #Cardmakingclass #Customerappreciation #KOCreationscards #Workshops

You can see in the bottom left picture my set up and samples ready for my next class which is on the 29th of May.

One reason I love teaching classes is seeing the faces of the people who come and them seeing the end results of their work. Everyone comes to these classes for different reasons, and I try to accomodate those needs as much as I can.

Here are some happy snaps of the lovely ladies working, laughing, chatting and helping each other.

#Specialreason #Thankyou #Cardmakingclass #Customerappreciation #KOCreationscards #Workshops

And here is another set of 3 pics with all of them holding up some of their completed cards.


#Specialreason #Thankyou #Cardmakingclass #Customerappreciation #KOCreationscards #Workshops

Each class consists of one harder more technique orientated card while the other 3 are easier and less technical. 
Todays hard card was a window card. They had to learn how to align dies and stamps using the stamp-a-ma-jig tool. I only had one complaint lol.

Here is the window card.
#Specialreason #Thankyou #Customerappreciation  #Cardmakingclass #KOCreationscards #Workshops

Some got the knack quicker than others, as in most class situations. But, they all did really well and perservered to create their (hard) card. And as usual once completed LOVED how it looked.
They all loved creating the other 3 cards and none minded the crowded feel too much. 

Well I hope you enjoyed seeing the smiling faces of my class today.

I will be back again in a couple of days sharing a project made from a lovely set available from the new catalogue. 
TTFN


Just a little information for you 

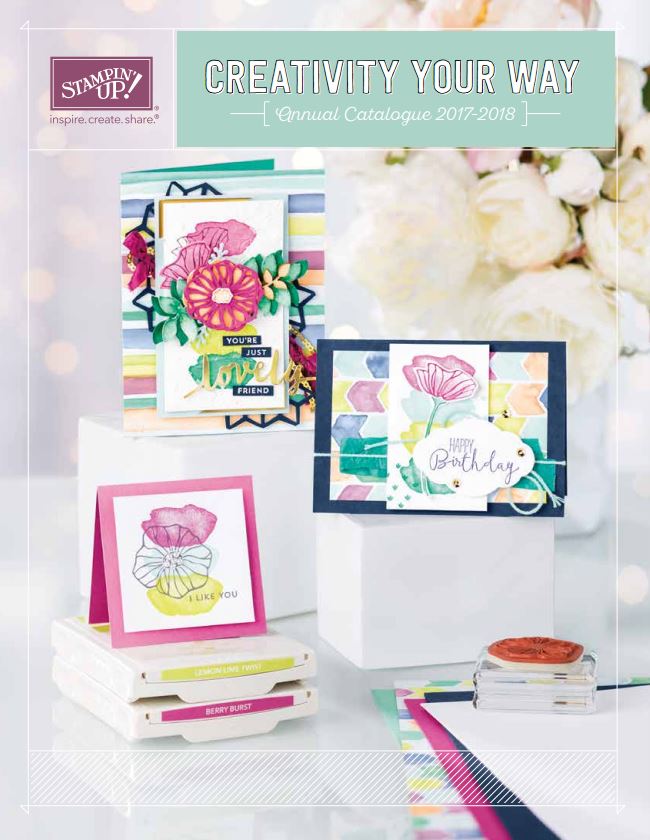
The new catty has been released (PDF form) to us (demonstrators). 

Unfortunatley at this stage I can only show you the front of the catalogue, sorry.

But here it is

Your sneak peek of the front of the new 2017-2018 catalogue ;)


Looks pretty doesn't it :)

I can't wait for you to be able to see the goodies inside! I was just blown away by some of the new products...But I must stop or I might share something I shouldn't!
If you want to see whats inside or get your hands on some of the new products you can always join up!
If you  Join Now you can purchase the Eastern Palace suite in your starter kit straight away PLUS you get to see the new catalogue too!!!


LIVE in Australia? Join My Team!

JOIN MY TEAM


You can also purchase items from the new catalogue from the 2nd of May when you join as a demonstrator.
You pay $169.00 and get $235.00 worth of products! (bundles and kits excluded)


Or just Join for the discounts and sneak peeks! lol I did :)


Lastly

If you would like to purchase anything you can find my shop here


Shop with Me

The Hostess code for April is has now closed.

 But don't despair I will be opening May's Hostess code in 7 days!


For those who purchased this April and used the April Code you will be entered into the draw below. If you spent under $50 you could win the card kit pictured.


BUT if you placed an order to the value of $50 or you could win the Nailed It Bundle!!!


Good luck to those who entered. 

I will add the winners names to the end of my next blog on the 27th at 7pm.


Thanks so much for stopping by ;)

Sunday, 5 March 2017

Crazy Crafters Blog Hop with Janneke de Jong

Image may contain: text

Welcome back once again crafters.

I love my life :)
I get to participate with the Crazy Crafters Team once again in another wonderful blog hop, this time CASEing the gorgeous Janneke de Jong.

You are currently here with me Kim Oliver.
I will have a list of names at the end of my blog to enable you to keep hopping along uninterrupted.


CASEing is where you Cope And Selective Edit...I have chosen this design of Janneke's to CASE
Janneke's card is a Gift card holder with a front...I made mine into cards.


I have used the same stamp and die set 'Special Reason bundle' from page 42 of the Occasions Catalogue. Plus I have kept the basic bones of this design.


I like to try and make each CASE my own...putting my stamp on the back of a CASE card just isn't enough.
So, I have stepped these cards up just a little bit.

I am going to use the cards that I have made from this hop as customer appreciation gifts for my next four customers!
I do hope they will like them :)

Thank You


#Specialreason #Thankyou #Customerappreciation #Springtime #Handmadecards #Australiammade #KOCreationscards #Saleabration

You can't really tell from the group picture above what some of the changes are that I have made....
So, in order to show how each card has subtle differences, I have taken single photo's with inside shots added beside them.

One obvious change is the addition of the 'Thank You' sentiment....this lovely stamp from the 'So Very Much' set and can be earned FREE from the SALE-A-BRATION catalogue, just for spending $90...


#Specialreason #Thankyou #Customerappreciation #Springtime #Handmadecards #Australiammade #KOCreationscards #Saleabration


The colours of this card really helps to make it POP, don't you think!?!
I have used the cut out leaves die in Chocolate Chip as a contrast. 
The flowers have been stamped using Bermuda Bay, stamping two images before re-inking. This gives a two toned effect. 
The base card stock is also Bermuda Bay. 
For each card I have moved the flower posy to the bottom corner of my cards. 


#Specialreason #Thankyou #Customerappreciation #Springtime #Handmadecards #Australiammade #KOCreationscards #Saleabration

Now this card above was definately a challenge.... as I wanted again to step up the design just one more level.
and because it's so hard to show exactly what I have done in the front on photo, this card deserved another photo ! lol
It will help me to explain what I did to step this design up another level.

#Specialreason #Thankyou #Customerappreciation #Springtime #Handmadecards #Australiammade #KOCreationscards #Saleabration

Can you see better now? 
It's a window!

I cut out both the front and the base layer to show the inside of the card. 
I cut each layer seperately using the negative die of the flower image. 
I put pencil marks around the petal holes to aid in positioning the die for the base layer. 
I did the same to the inside layer of the card and placed the solid die image where the pencil marks guided me to.. I then stamped the solid image inside the card using the die to help line up the stamp exactly where it had to be. 
If you try this for yourself, don't stick the base layer down completely until your stamping has been completed. Don't ask me how I know! 
But it needs to be stuck in place lightly in the correct position to enable stamping correctly and if you do make a mistake, you need to be able to remove it easily.

To finish the card I have added glue from the fine-tip glue pen to the centre of each flower, as well as placing a few spots of glue randomly over the card front.

#Specialreason #Thankyou #Customerappreciation #Springtime #Handmadecards #Australiammade #KOCreationscards #Saleabration

This particular card has the addition of a Chocolate Chip card base, this just helps to frame the Bermuda Bay that little bit more and tie the colours together.
Rhinestones have been added to the centre of the flowers on both cards done with the Bermuda Bay and Chocolate Chip colours, as well as placing a couple more in random positions of the front.

#Specialreason #Thankyou #Customerappreciation #Springtime #Handmadecards #Australiammade #KOCreationscards #Saleabration

The colours for this card and the more stepped up version are Pear Pizzaz and Watermelon Wonder. The flower images that have been die cut were stamped 3 times before re-inking. This gave even more varyation to the colours.
This card has a base of Pear Pizzaz card stock, to help tie in the colours a little bit more.
The addition of the washi tape to both of these cards was almost accidental...I made some cards using the Cool Treats bundle and had the washi tape still sitting on my table.
You can view those card HERE
I noticed that one of the washi's matched the watermelon wonder card base and Voila....More magic lol
This card has also had Old Olive Bakers Twine added ....Shhhhh don't tell anyone, but you can't really see the difference in the colour from the Pear Pizzaz unless you look reeeeally closely :)


#Specialreason #Thankyou #Customerappreciation #Springtime #Handmadecards #Australiammade #KOCreationscards #Saleabration
  
I hope you have enjoyed my projects today.
I will now share the list of other partcipants playing along.


OH!
Nearly forgot to mention.....
 Don't forget Sale-A-Bration is still happening!
Spend $90 to earn one FREE product, you can choose anything from these products in the images below.

1st release Catty

No automatic alt text available.

2nd Release Catty

Image may contain: text


If you live in Australia and LOVE paper Crafting of any desription or perhaps you would like to earn extra money, then Stampin Up may be just the thing you need!
I am always looking for new people with a love of papercrafting to join my team.

Click HERE  to sign up and start getting your %20 discount on all your Stampin' Up! products!


If you would like to purchase any of the items I used to creat my projects with, I ahev placed them all in this carousal for your shopping convenience.