

Hello and welcome to my blog.
I am taking part in a blog hop with the Crazy Crafters team today. Our special guest for this hop is the fabulous
Rachel Tessman from Stamp Your Art Out.
The Crazy Crafter team are all choosing a project of Rachels to CASE and then sharing everything about it with you here today.
You are currently visiting me Kim Oliver - KOCreations Cards. I have a list of all hop participants closer to the end of this post.
Here is project I have chosen to CASE.

I loved the idea of this design.
Origami, the angles and score lines that create this awesome folded card. AND it's interactive!
What more could a kid want 😍
Here is my project
I have created this for my daughter who will be turning 8 later in the year.
Nothing like being prepared 😉
I had alot of fun creating this fun fold design, I do hope that my daughter enjoys it too when her birthday comes around 😍
Rachel Tessman from Stamp Your Art Out.
The Crazy Crafter team are all choosing a project of Rachels to CASE and then sharing everything about it with you here today.
You are currently visiting me Kim Oliver - KOCreations Cards. I have a list of all hop participants closer to the end of this post.
Here is project I have chosen to CASE.

I loved the idea of this design.
Origami, the angles and score lines that create this awesome folded card. AND it's interactive!
What more could a kid want 😍
Here is my project
I have created this for my daughter who will be turning 8 later in the year.
Nothing like being prepared 😉
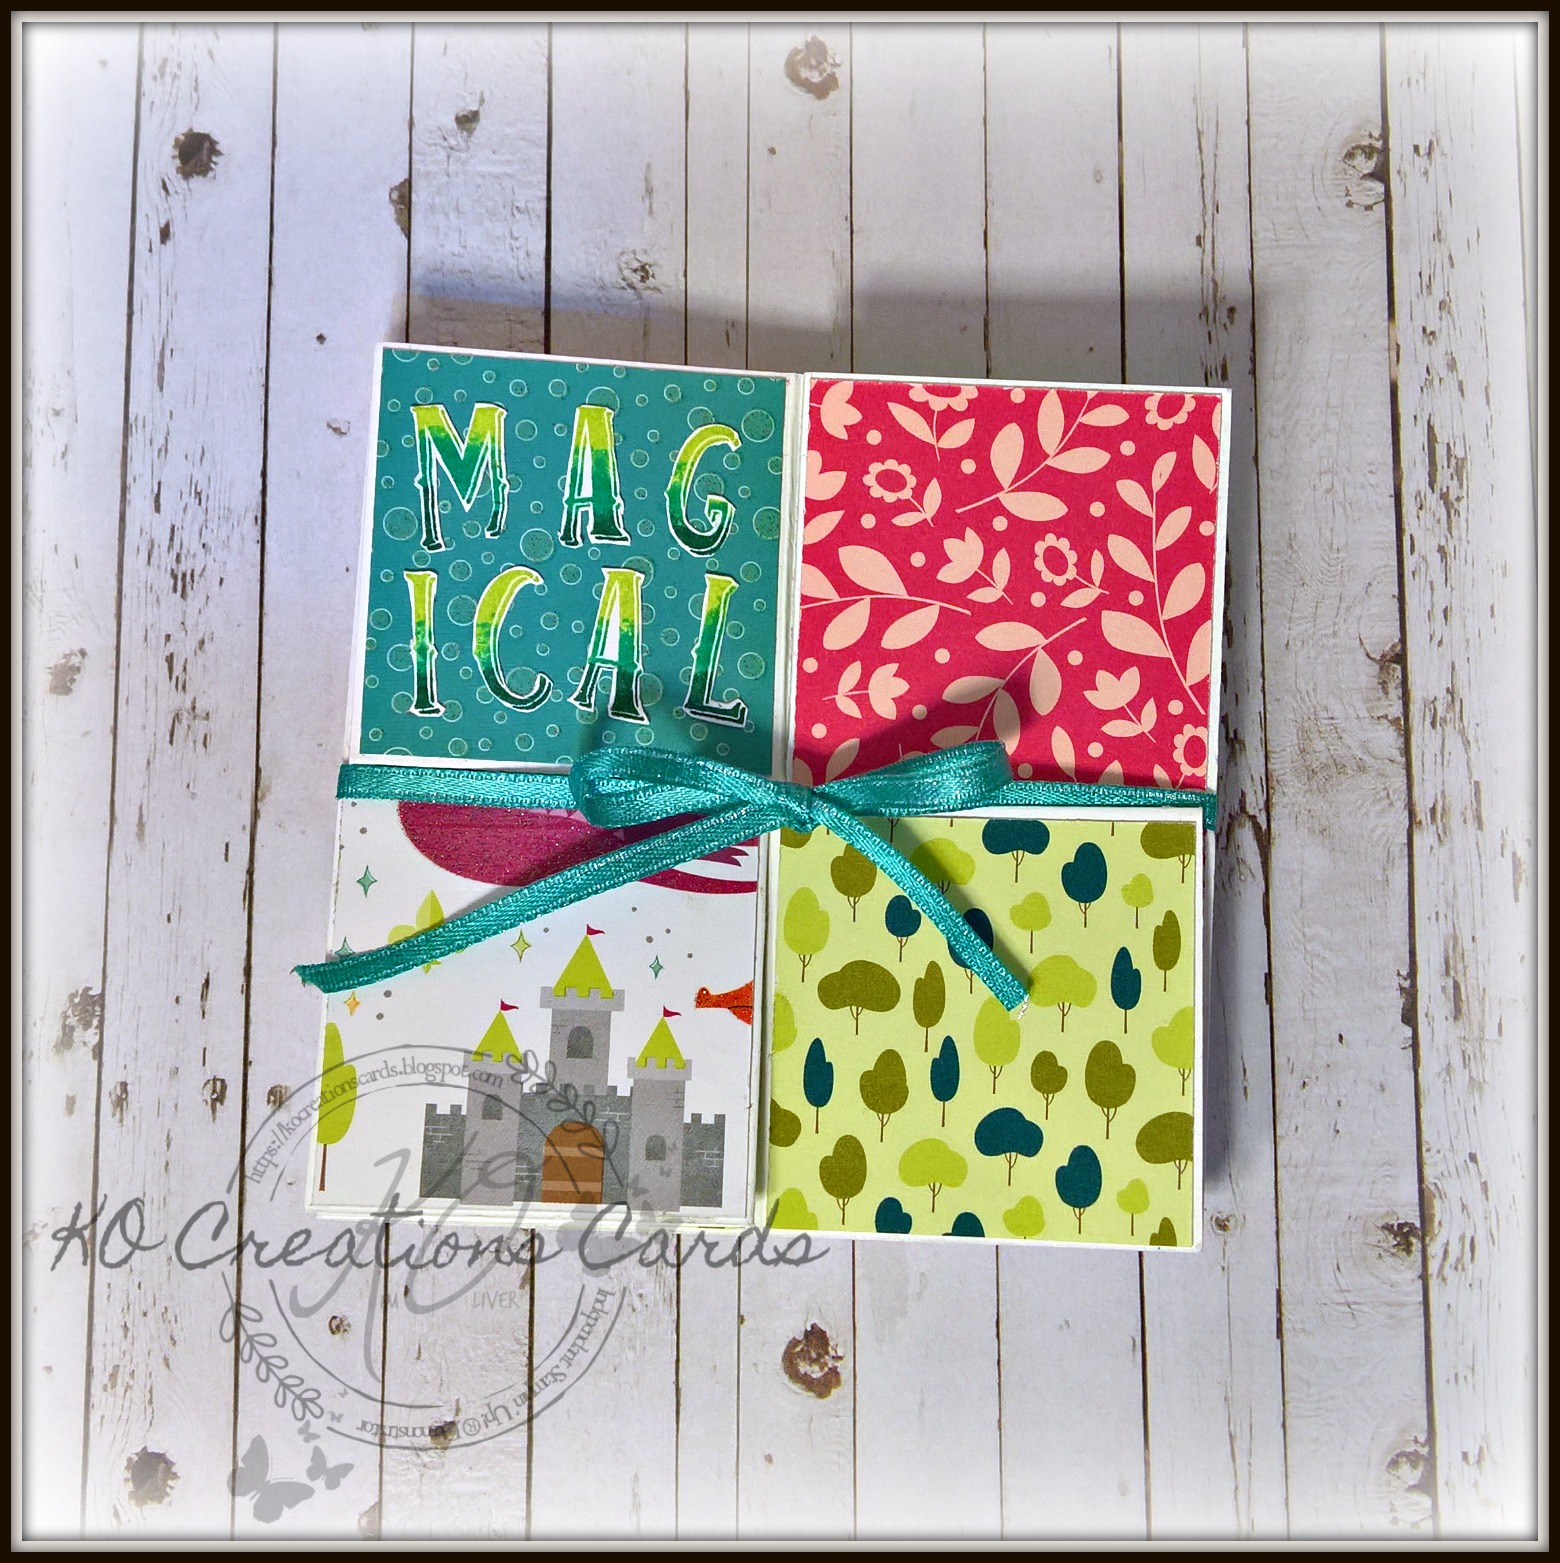
Magical
Closed View
 |
| #kocreationscards #birthdaycard #mythsandmagic #papercraft #origami #stampinup #cardmaking #handmade #diy |
Items Used
- Myths and Magic Designer Series Paper (retiring) cut at (4.8cm x 4.8cm = 1⅞" x 1⅞" squares) x 8 pieces 2 of each design.
- Magical Day bundle (retiring)
- A4 thick Whisper White, keep offcuts for stamping unicorn and sentiment.
- A4 Lemon Lime Twist card stock. (Cut at 4.8cm x 4.8cm = 1⅞" x 1⅞" squares) x 6 pieces
- Stampin' Blends
- Stampin' Trimmer
- Multipurpose liquid glue
- Glimmer paper(retiring)
- rhinestone basic jewels
Twist and Fold Base Instructions
- Cut A4 to 20cm x 20cm square or (8" x 8") Score at 5cm (2") on every side. Score at the 10cm (4") mark to the score line on all for sides. Mark the score line where it touches the inside square. Score from point to point to create a diamond shape
- Turn over the card stock so that score lines facing you are mountain formation. Fold on 5cm (2") score line toward the centre (away from you) on each 5cm around the outside.
- Turn over and fold the 10cm short score (4") line towards you and burnish.
- Gently fold the diamond shape score lines toward you one at a time and burnish.
- Gather each corner, one at a time and gently fold it to the left encouraging it to fold shut.(you will need both hands)
- Turn over and score the base.
- Open and add DSP and other decorations.
(steps 1-7 image)
 |
| #kocreationscards #birthdaycard #mythsandmagic #papercraft #origami #stampinup #cardmaking #handmade #diy |
Basic Decorating Instructions
- Cut 8 pieces of DSP at 4.8cm x 4.8cm (1⅞" x 1⅞")
- Cut 6 pieces of coloured card stock at 4.8cm x 4.8ccm (1⅞" x 1⅞"). Cut two of these squares into triangles by cutting from one corner to the opposite corner. This will give you 4 triangles.
- Adhere into position
- *Stamp and cut images and place in centre diamond.
*When layering central images try not to add much dimension as it stop the fold from sitting correctly.
Open View
 |
| #kocreationscards #birthdaycard #mythsandmagic #papercraft #origami #stampinup #cardmaking #handmade #diy |
I had alot of fun creating this fun fold design, I do hope that my daughter enjoys it too when her birthday comes around 😍
Giphy showing opening and closing action.
To continue moving through this fabulous hop please click the name directly after mine from the list below.
Below you will find a carousel containing links to items that were used to create the above project with, PLUS
Hostess Codes and TUTORIALS. (Tutorial is at the bottom)
There is an amazing bundle that you can purchase atm for your kit, so now is the prefect time.
 |
You can get all of this for $169.00 and FREE POSTAGE. This Share What You Love bundle includes 3 FREE items!
If this doesn't float your boat then choose your starter kit your way for $169.00 and get $235.00 of product with FREE POSTAGE. Contact me for more information.
Love Stampin Up! products and the current colours?? Then please be aware that these colours below are retiring soon. Get all of your retiring coloured products with me before they run out.
 |
This lovely little picture below is of me with MY new catalogue.
I must say I L.O.V.E IT!
Sorry the front is all I can show you atm.
 |
| #stampingup30 #stampinup #colorrevamp #colourrevamp #retiringproducts #kocreationscards #2018annualcatalogue #joinmyteam |
If you want to see whats inside NOW then JOIN!
It's obligation free to join.
You will get a copy of the new catalogue mailed to you in May if you have placed an order with me in the last 6 months. If you are not sure if you have placed an order with me you can contact me to find out or
SHOP NOW
to ensure you are on my mailing list PLUS grab those retiring products before they are all gone!
RETIRING OCCASIONS CATALOGUE PRODUCT LIST
RETIRING ANNUAL CATALOGUE PRODUCT LIST
As an added bonus you get Free with any product purchase of $50 during the month of APRIL is this fabulous tutorial bundle using the Myths and Magic suite PLUS the True Gentleman suite.

Free with product purchase of: $50 AU
Or
You can purchase this bundle separately just by clicking below.
Please add a note with your payment with the word 'APRIL' for my reference.
I will then email you the complete tutorial bundle within 48hrs

This is TUTORIAL available for purchase world wide.
Thank you so very much for visiting today. If you have any questions please don't hesitate to ask in the comments section below.
I appreciate every comment made and I always respond to a question 😊
Wow! What an awesome card! Definitely going to CASE that for one of my Great Nephews! Thank you!
ReplyDeleteThat is AWESOME!! I actually just sat here watching that giphy over and over!
ReplyDeleteAmazing project Kim!! What a cool idea - love that you have the gif too. Awesome work.
ReplyDeleteLove this Kim, I'm sure your daughter will too! This has to be one of my favs from Myths & Magic
ReplyDeleteThis is such a fun card, Kim! Love it!
ReplyDeleteSo cool Kim. Love it!
ReplyDeleteAmazing!!! Love it!
ReplyDeleteWhat a fun card! Thanks for your clearly worded list of instructions for making one. I'm off to try it out!
ReplyDeleteAwesome card Kim! Thanks for the tutorial, might have to try it out for myself :)
ReplyDelete