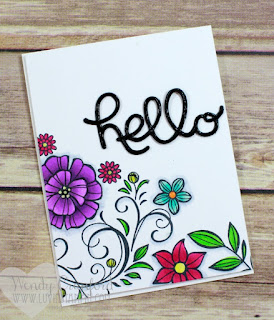
Showing posts with label #Flourishingphrases. Show all posts

Wednesday, 12 April 2017

KB's International Highlights - Weddings


Welcome back crafty people :)

Today I am taking part in a monthly pictorial blog highlight.
This is where we get highlighted on Kylie Bertucci's Blog. 

Image may contain: text

Kylie has a thumb nail image of everyones project and you can vote for the ones you like best!
I would love it if you chose to vote for me!

If I am chosen on the top 10 I get to take part in the Internationa blog hop for April!

Image may contain: text

Our theme this month is Weddings. 

And as I have a friend getting married this November I thought I would make their wedding card now...I am also making their invitations...so, I may not have time to get the wedding card done later!

Here it is :)

Front View


#KOCreationscards #Flourishingphrases #Floralphrases #Sunshinewishesthinlits #Weddedbliss #Love #Twohearts #Butterflies #Flutteringembossingfolder


I chose traditional colours for their card, plus I know what the colour scheme is for the wedding hehehe. That always makes for an added personal touch.


Inside View


#KOCreationscards #Flourishingphrases #Floralphrases #Sunshinewishesthinlits #Weddedbliss #Love #Twohearts #Butterflies  #Flutteringembossingfolder


Angled View


#KOCreationscards #Flourishingphrases #Floralphrases #Sunshinewishesthinlits #Weddedbliss #Love #Twohearts #Butterflies  #Flutteringembossingfolder

Method

  • This card has 4 layers on the front,  before reaching the card base itself. The inside has two layer on top of the base. 

  • You can just see in the back ground of the card front the edges of silver lace...This was stamped using the Delicate Details stamp set on a seperate piece of basic black card stock.

  • For the focal card stock piece (Whisper White) I used the embossing folder Fluttering.This was layered direcetly onto Silver Foil and that was layered directly onto Basic Black card stock, which in turn was layered onto the stamped and Silver heat embossed lace images.

  • For the focal images, I chose the Sunshine Wishes scribble heart. This has been die cut in silver and black and then layered on top of each other but slightly askew..

  • The butterflies have been punched using the Elegant Butterfly and Bitty butterfly punches, This has also been done in silver and black.For the flourish on the butterflies, I embossed in silver the flourish from the flourishing phrases stamp set. I then cut my butterflies so that one side of each had part of the flourish showing..

  • When all focal pieces had been put in place, I then placed the whole lot onto dimensionals and attached to the base.

  • The sentiment for the inside is from Floral Phrases. This has been stamped first in versamark embossing ink then stazon jet black. I then lightly dusted half of the sentiment in silver embossing powder and heated.This gives a two toned effect. I added the two butterflies to aid in carrying the theme through to the inside.

  • To finish this card I used the Congratulations sentiment from the Floral Phrases stamp set mounted on a banner, I then added some sequins from the metallics sequins assortment.


I hope you like this card enough to consider voting for me. Click the pic below and find my card in the pics. Click the heart to vote for my card project.

Image may contain: text 

Thank you so very much for choosing my design to vote for xx

If you would like to get a full list if all items used then I have added them all for your convenience in the carousel below.


Sunday, 2 April 2017

Crazy Crafter's Blog Hop with Mikaela Titheridge

Hello again crafter's


#Specialreason #Touchesoftexture #KOCreationscards #Pumpkinpie #Flourishingphrases #Allthingsthanks #Suitesentiments #Loveitchopit


Today I am participating in a blog hop with a wonderful team that I am a member of The Crazy Crafters...I feel so lucky to be part of this group #bestteamever.
Our blog hop today is with special guest Mikaela Titheridge


Image may contain: text

We will all choosing a project and CASEing it to share with everyone here in the Hop. 
FYI : CASEing is where we Copy And Selective Edit.
At the bottomof my post you will find a list of other participants and all you need to do is click the next name after mine to follow through and keep hopping. You are curently here with me Kim Oliver.
 Mikaela has so many gorgeous projects to choose from, but I did notice a longer thin style top fold card a number of times amongst her posts. So that was my base layout for my projects.
Then I found this!
This is the image that inspired my projects for this wonderful blog hop.

Available: www.thecraftyoinkpen.stampinup.net

 Mikaela had made up some kit gift boxes from the Perfectly Wrapped kit and loved the colours she made cards to match.


I too loved these colours!
 They just spoke to me.
And I hadn't used my Pumpkin Pie ink pad yet :) lol perfect excuse. I chose to work with only the Pumpkin Pie and Basic Black, I didn't add any Emerald Envy into my projects at all.

OK
Here is my first card

 Front View


#Specialreason #Touchesoftexture #KOCreationscards #Pumpkinpie #Flourishingphrases #Allthingsthanks #Suitesentiments #Loveitchopit

Have you ever been creating and found that your project takes on a life of it's own! This is one of those times!...I had to physically make myself stop putting things on this card.
 I kept looking at it and wanting to add more!
I just didn't feel happy with it, so I just walked away and went and had lunch.

When I returned I just went WOW!!
Yep, so glad I walked away, and created the inside :)

The sentiment on the front is from the 'Suite Sentiments' stamp set

Inside View


#Specialreason #Touchesoftexture #KOCreationscards #Pumpkinpie #Flourishingphrases #Allthingsthanks #Suitesentiments #Loveitchopit


I love the inside of this card so much!
So much so, that the inside images I had stamped together got my creativity happening again!
I just had to make another card with the same layout, but using these images in the format that I had just done above.


So here is card 2

Front View

Card 2


#Specialreason #Touchesoftexture #KOCreationscards #Pumpkinpie #Flourishingphrases #Allthingsthanks #Suitesentiments #Loveitchopit


It is such a stark contrast to the first card!
I think it's mainly because of all the white..I just couldn't handle it, lol.
 I am beginning to realise I don't like alot of empty space!
 So, I just had to fill some of the area with sequins and splashes from the 'Touches Of Texture' stamp set. 
I stamped the dragonfly's top layer in vellum, then coloured behind the image. I die cut and trimmed off the head and body, added a glue dot and placed it atop the stamped image underneath.

For the inside I kept it even simpler still. I just used a splash of colour from the background stamp in the 'Touches Of Texture' stamp set.

Inside View

Card 2

#Specialreason #Touchesoftexture #KOCreationscards #Pumpkinpie #Flourishingphrases #Allthingsthanks #Suitesentiments #Loveitchopit


Here is a pic of them side by side..
Same materials, but such stark contrast to each other.

#Specialreason #Touchesoftexture #KOCreationscards #Pumpkinpie #Flourishingphrases #Allthingsthanks #Suitesentiments #Loveitchopit


I hope you enjoyed the projects I have shared with you today.

You will find the list of other participants below, Just click the name after mine to keep hopping along.


I have just started a monthly newsletter. 


If you would like to be updated on special deals, hostess codes and even tutorials then.


If you live in Australia and are thinking of joining Stampin' Up!
Then I would be honoured to have you as part of my team, please click the picture below to join.
Earn money doing what you love! 


LIVE in Australia? Join My Team!


If you would like to purchase anything you can find my shop here

Shop with Me


The Hostess code for April is 7CEYPST2 

If you use this code for the month of Aril for any purchase you will go into the draw to win the Pretty Pocket Card Kit


BUT if you place an order to the value of $50 or more you will enter the draw to win the Nailed It Bundle!!!


But remember to be entered you must use the HOSTESS CODE 7CEYPST2 when at checkout stage of your purchases.You must RESIDE IN AUSTRALIA and you MUST enter your CONTACT DETAILS.


If you would like a list of items I used or perhaps you would like to purchase something? Then I have added them all for your convenience to the carousel below


Thank you so much for stopping by today.
If you have any questions please use the comments section and I will answer ASAP
Have a fabulous day.
 I will be back again real soon xx


Sunday, 11 September 2016

Crazy Crafters Blog Hop CASEing Sarah Berry


WELCOME

Today we the 'Crazy Crafters' team are CASEing the lovely Sarah Berry
You may have heard of her challenge Strawberry Sketches!?!
  
I chose Sarah's Voucher card & also one of her cards created for a sketch challenge.

Here are my chosen cards to CASE


I went for a Christmas theme for my first card & chose Night of  Navy blended with Soft Sky. The card stock used is Night of Navy with Whisper White, layered on top of each other to frame my image. I used the Dazzling Diamond glimmer paper for the top of my star with Silver Foil underneath. 

'Christmas Spirit'


#Staroflight #Starburst #Christmastrinkets #KOCreationscards #Handmade

Instead of a voucher I used this as a normal card. I stamped the inside with the star swirls from the Star of Light stamp set

#Staroflight #Starburst #Christmastrinkets #KOCreationscards #Handmade

My swirl wouldn't stamp correctly (missing the middle) & as it was too late to change my idea I adapted my images. I covered the missing piece with my star on the front & inside I stamped through the missing area then added a smaller star to keep my theme throughout my card.


How the following card came about was because I had leftover flourish pieces from my Razzleberry Flourish card made for previous challenge. When I was searching through Sarah's cards, I found her card above & thought that it would be a perfect way to use my left over bits.  

So, here it is.

'HELLO'

#Flourishingphrases #Inkblending #Richrazzleberry #KOCreationscards #Handmade 

I used the same colours as my Razzleberry Flourishes card as they were the colours of my left over pieces lol :-)


'Inside view'

#Flourishingphrases #Inkblending #Richrazzleberry #KOCreationscards #Handmade 

Don't forget to keep hopping along with our other Crazy Crafters as they ahve all made some wonderful cards for you to see & comment on.

To move further through the list just click the name after mine :-)


If you would like to purchase any of the items I used to create my cards, I have listed them for your convenience in the carousal below :-)


Thank you so very much for visiting my blog :-)


Friday, 9 September 2016

Razzleberry Flourishes

      Razzleberry Flourishes

         Twice as much bang for your buck hehehe

A colour challenge by Michelle Quinno over at Pals Paper Arts

&

a CASETHISCARD challenge over at www.jessieholton.com


#PPA317                                          #CTC002 


                                                      Kim Oliver CTC001 Winning Card 


Last week I was chosen as the winner of  Jessie's very first Blog challenge #CTC001! 
This mean't that this week, I had to CASE my own card if I was going to enter again!  

I didn't think that CASEing my own creation was going to be quite so difficult! 

I wanted to use the blending technique (I am in love with blending atm)  & use the acetate window sheet BUT still make something that looked totally different! 

So, I looked for a colour scheme that was bright, fun, on trend & out there. 
While I was pondering I received an e-mail notification from the team at PPA. It was letting me know about their latest challenge for this week.

A colour challenge 

& WOW 

WAS IT GORGEOUS!

Rich Razzleberry - Crushed Curry - Tangerine Tango

So, I think I succeeded in making something beautiful and totally different from my first design while still using some of my original ideas from Irresistibly Floral :-)

Here is my card

RAZZLEBERRY FLOURISHES

I have added this card to Kylie Berucci's Weekly Team Project Highlights here is the link for Voting Opens Friday evening 16/9/16
 
#Razzleberryflourishes #KOCreationscards #Handmade #Flourishingphrases #Flourishthinlits #CTC002 #PPA317 #StampinUp

I am going to add a quick set if instructions only as I am hoping to add a video to this blog later today!

How I made Razzleberry Flourishes :

  • Cut 2 thick Whisper White card bases at 15 cm x 10.5 cm. 
  • Cut a sheet of Acetate to 18 cm x 10.5 cm. Fold and score this with your bone scorer at 15 cm. This will leave a 3 cm fold to attach to the inside of your card base.
  • Trim 3.7 cm from the front right side of both sheets of the white card bases.
  • Put Tear & Tape Adhesive and a small amount of glue from the fine tip glue bottle on to the back of the 3 cm flap of the acetate and attach to the inside of one of the card bases.
  • Now you will have the front of the white cards stock to attach to the acetate. Do this by adhering with Tear & Tape and the same glue. Press firmly together lining up as best as possible and if necessary trim any sides that are not exactly lined up.
  • Okay now you can attach the second card base to the inside of the first card base. This covers all unsightly tape & glue on the acetate window. 
  • Cut 2 pieces of Rich Razzleberry card stock 1 @ 6 cm x 14.5 cm adhere this with Stampin' Dimensionals to the front white pane. Cut the second piece @ 10 cm x 14 cm & adhere this with Tear & Tape to the inside of the card.


#Razzleberryflourishes #KOCreationscards #Handmade #Flourishingphrases #Flourishthinlits #CTC002 #PPA317 #StampinUp


  • Righto now we are ready for the gorgeous striped white on white embossed DSP from the 'Irresistibly Floral' series that will be ink blended as per the photo's
  • Cut a corner off this DSP on the diagonal so that the stripes are also running diagonally. (I couldn't remember that word 'diagonally' in the video lol nor the name of  the Stampin' Trimmer)
  • Now cut a wider strip trying to keep running parallel to your first cut, then trim this down to 14 cm x 5.7 cm. 
  • Also cut a piece of whisper white card stock to 9.5 cm x 13.5 cm to place over the Rich Razzleberry card inside. This will also be blended with those gorgeous colours 
  • Blend according to my instructions on my 'Irresistibly Floral' blog page using the above colours.
  • Once all ink blended to your satisfaction adhere the front panel with Stampin' Dimensional. and inside with Tear & Tape.
  • Cut 2 flourishes, 1 large & 1 small...in Rich Razzleberry..... I fell in love with the smallest flourish on a sweet card made by Kylie Bertucci (click her name to see the card)
  • Attach the large flourish to the front of your card using the fine-tip glue in which ever position you like best :-)
  • I placed the smallest flourish on the inside panel but so you could still see it through the acetate window panel.
  • I added Rhinestone basic jewels to the little circle on the flourishes.
  • For the sentiment I used my Embossing Buddy, Versa Mark ink, White Stampin' Emboss Powder and the 'Just a Note' from the Flourishing Phrases stamp set. All set with my heat tool onto a piece of Rich Razzleberry. This was trimmed and ribbonised then placed in the top left corner of the card.
  • To finish it all off I tied a piece of thick white bakers twine under & over the striped and blended panel.

(Hopefully in this spot, there will be a video soon)

#Razzleberryflourishes #KOCreationscards #Handmade #Flourishingphrases #Flourishthinlits #CTC002 #PPA317 #StampinUp 


I hope you enjoyed my creativity today.

If you would like to purchase any of the items used to make my card please view the carousal below.


Thank you so very much for stopping by my blog today, I hope to see you back again soon.

Sunday, 28 August 2016

Crazy Crafters Blog Hop- CASEing Wendy Cranford


Hi !


Today's card has been inspired by our fabulous creator & guest Wendy Cranford
I chose this gorgeous card of Wendy's to CASE


 How to Stamp A Floral Background
#Wendycranford


I just love how vibrant and fun this card is. Wendy shows her love of having the main focal in a corner so well with this design. I wanted to make something similar, but also to make it mine.

I chose my colours from the #PPA315 colour challenge by Michelle Gleeson.


I also thought I would enter this card into the Stamp,ink,paper challenge #SIP062 as it fits the sketch above !


Here is my card

'JUST A NOTE'

#Flourishingphrases #KOCreationscards #Resistinking #Enamelshapes #Blending

I am also a lover of having the focal stamped design in a corner, then stamping the image off the page a little. I chose to do my image using white embossing powder on Whisper White card stock and use the resist inking technique.
 For the ink blending over the embossed image I used Old Olive at the bottom, followed by So Saffron and finished at the top with Dapper Denim.
I coloured the flowers with So Saffron on top of the blending process just to make them stand out a little more. I also did the same with the leaves using Old Olive.
For the dots I used the smallest circles from the enamel shapes in Dapper Denim.

I wanted a sentiment tag, but I didn't want to cover any of the card and it's beautiful colour. So to keep the colour unbroken, I decided I would use a small rectangle of acetate 'Window Sheet' stamped with 'Whisper White' craft ink. This made the writing stand against out from the background, plus coordinated with the card perfectly. I cut to length a small strip of 'Dapper Denim' Washi Tape from the Moroccan Designer Washi Tape set. I topped that with a bow of Thick 'Whisper White' Bakers Twine.

 #Flourishingphrases #KOCreationscards #Resistinking #Enamelshapes #Blending

I also wanted the pretty colours to follow through to the inside of my card. So I did almost the same as the front but kept the ink blending to the bottom right of the paper, leaving a large area clean for a personal message.

#Flourishingphrases #KOCreationscards #Resistinking #Enamelshapes #Blending

Don't forget to keep hopping along with all of the other talented Crazy Crafters by following the link below.


If you would like to purchase any of these products used to make this card, just take a look at the carousal below until you find the desired item you need.


Thank you for stopping by x