Showing posts with label #Smooshing. Show all posts

Friday, 20 October 2017

Ink It! Stamp It! Design Team Blog Hop - Technique


Welcome back everyone 😊
I am hopping today as part of the fabulous Ink It Stamp It! Design Team.
This month we will be sharing projects inspired by our favourite techniques. 
My favourite technique is Smooshing. 


#KOCreationscards #Stampinblends #Smooshing #Christmsacards #Cardmaking #Seasonofjoy
 

The full line up below will guide through all the projects and we'd love to hear from you on what your favourite technique is ? 

#KOCreationscards #Stampinblends #Smooshing #Christmsacards #Cardmaking #Seasonofjoy

I used this technique with the new Stampin' Blends.
 Stampin Up!'s soon to be released Alcohol Blending pens that us Demo's got to pre-order recently. 
Part of the perks of being a Demo 😍 


We get some time to learn how to use new products such as these, before they become available to you, our customers.
These markers will be avialble from the 1st of November!


You are ALL going to LOVE them!

They are super easy to use and each available colour has a light and a dark shade plus there are 2 skin tones and a colour lifter!
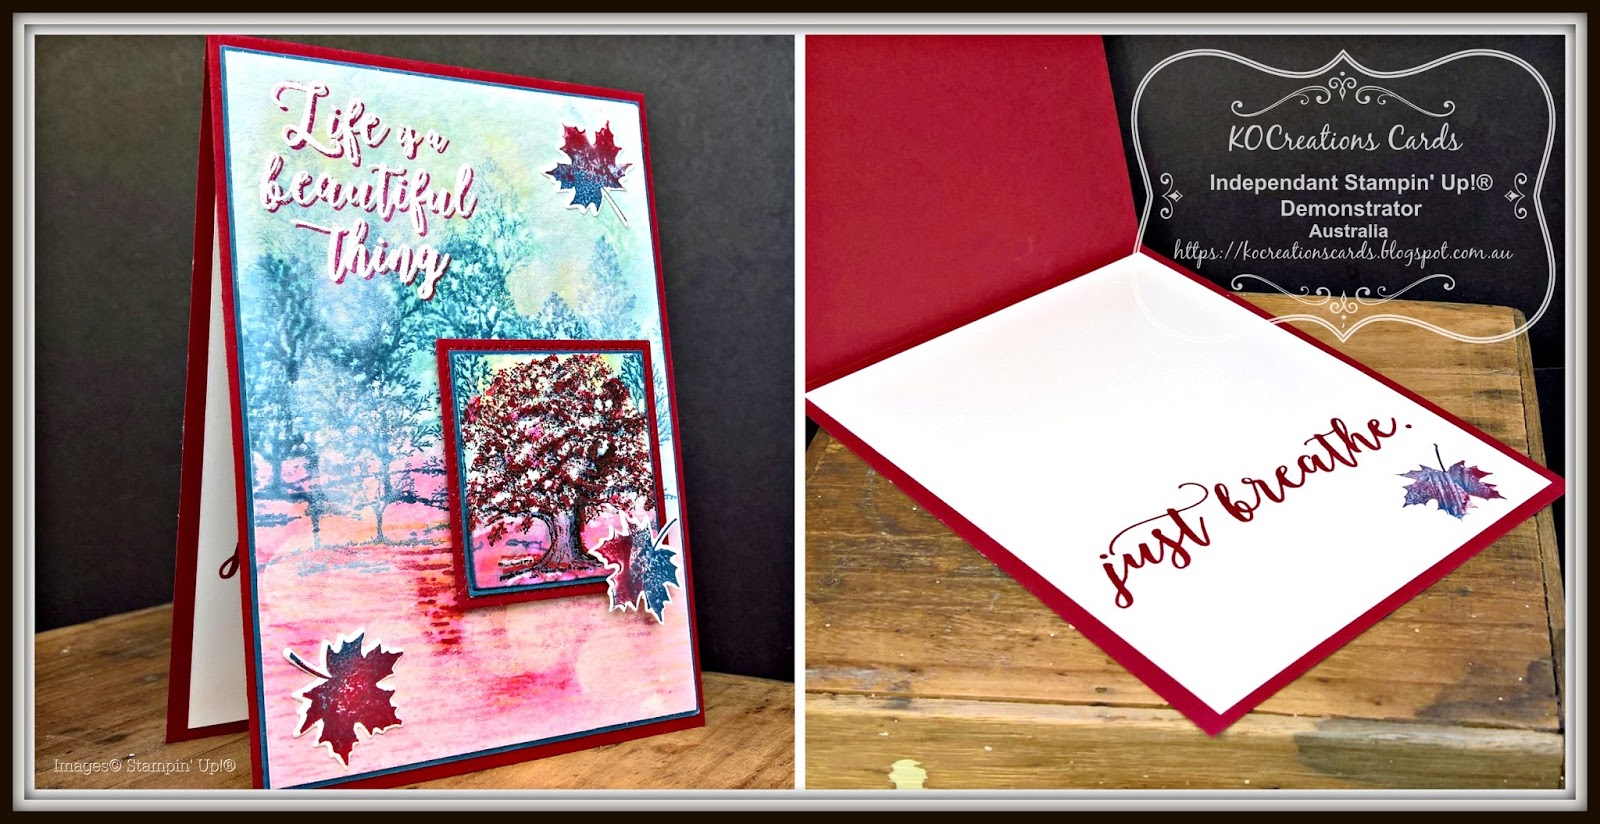
Here is a better picture of my smooshing and the resulting card of my play with these new pens.

Season Of Joy


#KOCreationscards #Stampinblends #Smooshing #Christmsacards #Cardmaking #Seasonofjoy


To achieve this effect for my smooshed background I used my Stampin' Blends on a clear Stamp Block. 
  1. Just scribble the alcohol pens onto the clear block in the colours of your choice. 
  2. Then pour on a small amount of alcohol blending solution over the scribbled colours, this re wets the inked area.
  3. Then turn upside down onto the glossy white card stock. 
  4. Smoosh around until the colours blend and you get a look you like.
  5.  Dab off excess with a baby wipe. 
Repeat steps 1 through 5 for darker colours.

The Stamp and Thinlits set I used are from the Christmas Pines set. 
The little flower is part of the Blossom Builder punch. 
The little swirls of paper are the trimmings from my card base edges. I really like the way these little scrappy pieces look on the card.
What do you think?

I finished this all of with some Gold Enamel shapes and a sentiment in the bottom right corner.

A super simple yet so very effective Christmas Card!


Thank you so much for joining us today. We hope you'll join us again next month to see our Christmas  projects. I'm Kim Oliver and to keep hopping around see the list below to see who is up next.


If you are searching to purchase any of the items (other than the Stampin Blends) then please use the carousel below. It has all items listed and is linked directly to my store.


Thank you so much for visiting today.
If you have any questions please use the comments section below.
I always reply 😉

Sunday, 6 August 2017

Vintage Leaves -Tabs For Everything - GDP098


Welcome back everyone 😊

#KOCreationscards #Vintageleaves #Smooshing #Cardmaking #Gold #Autumn #Tabsforeverything #Embossing #Enamelshapes #Coffeebreak #Stampinup #GDP098

I am sharing with you all today a new set I have recently purchased called Vintage Leaves.
I fell in love with this set as soon as I saw it in the Annual Catalogue.
The Autumn season has finished here in Australia and we are now in mid Winter.
But Autumn for me means brisk chilly days filled with a riot of colour.
My daughter and I love collecting leaves of all different colours over Autumn during our walks. She glues them to absolutey everything! lol. Me I just keep a couple and put them between the pages of a few heavy books where I keep other special flowers I have been given or found over my lifetime.

I used the Global Design Projects weekly challenge for my inspiration point and started creating.


Here is my card

Celebrate Love

#KOCreationscards #Vintageleaves #Smooshing #Cardmaking #Gold #Autumn #Tabsforeverything #Embossing #Enamelshapes #Coffeebreak #Stampinup #GDP098

My card base is Crumb Cake card stock with a layer of wood grain DSP from the Coffee Break suite.
To create my leaves began by smooshing an A4 sheet of thick Whisper white with Cajun Craze, Daffodil Delight, Chocolate Chip and Pumpkin Pie. 
I let it dry and then stamped my leaf images over the top.

#KOCreationscards #Vintageleaves #Smooshing #Cardmaking #Gold #Autumn #Tabsforeverything #Embossing #Enamelshapes #Coffeebreak #Stampinup #GDP098
When the leaves had all been cut I chose three of roughly the same shade and gold embossed over the  already stamped images. As I wanted gold highlights for my card.
I used metallic Gold Thread and wrapped that around the stems of the leaves. I wrapped this also around the DSP twice and coiled it under the leaves. 
The leaves are held in place with glue dots.
For my sentiment I chose to use the Tabs for Everything stamp and punch set. 

#KOCreationscards #Vintageleaves #Smooshing #Cardmaking #Gold #Autumn #Tabsforeverything #Embossing #Enamelshapes #Coffeebreak #Stampinup #GDP098

To finish this card off and carry through the gold just that little bit more I added 5 metallic enamel shapes.
For the inside I added a small die cut leaf with gold thread looped behind and 1 metallic gold shape.


If you would like to purchase any of the items I used to create this card project with today then look no further than the carousel below. It has all items listed and is linked directly to my store.
When ordering on line with me please remember to use the
Hostess Code for August
VSF96XYM
All those who use the code and enter their contact details go into the draw for the 2 monthly prizes that are available. 1 prize is for orders up to $100 and the other prize is for orders $100 and over


For the month of August everyone...Demo's Customers absolutely EVERYONE can pre-order this fabulous set that will be available in the new Holiday Catalogue set to be released in September!
To order your Stamp set, Die set or 
EVEN BETTER 
save 10% and buy the bundle! 
Then just click HERE


Thank you so very much for stopping by my blog today. 
I hope you have enjoyed my creative efforts 😊
If you have any questions please feel free to use the comments section to ask them. 
I always reply!


Wednesday, 17 May 2017

May 2017 - International Blog Highlights - Masculine

Image may contain: text

Hello crafters :)

Today I am taking part in an International Gallery Blog. This Gallery has photo's of Stampin' Up! demonstrators works from all over the world and is Hosted by Kylie Bertucci.
Our theme today is Masculine.
Voting goes live from 8 am Wednesday 17th May
You can vote for my project by clicking HERE or wait until you find the button further down to click on .

I created my project using three stamp sets today 'Lovely as Tree' and  'Colorful Seasons' and 'High Tide'

The colours in my project were inspired by the Colour Inskpiration Colour challenge #CI09
If you would like to join in you don't need a blog. All you need to do is join the group HERE and then create and then upload your photo of your project to the group page.
It's that easy!


 All I can say about these colours are WOW!
They look absolutely stunning put together like this don't they!

Here is my project.

Autumn Days

Front view

#Colorfulseasons #Lovelyasatree #KOcreationscards #Hightide #Autumnintassie #Bokehtechnique #Smooshing #Watercolouring #Masculinecard #Unisex

For my project I was inspired as mentioned by the #CI08 colours, but also the picture that was used.
It is currently Autumn here in Tasmania where I live, so this scene that I have created reminds me of an Autumn day nearing it's end at dusk, just after rain 💦

The Bokeh effect over the top really helps to soften the effect and gives a dreamy quality but still enables the impact of these bright and vibrant colours to shine...My favourite place is in the middle of the bush lol can you tell 😊

  Angled and Inside View

#Colorfulseasons #Lovelyasatree #KOcreationscards #Hightide #Autumnintassie #Bokehtechnique #Smooshing #Watercolouring #Masculinecard #Unisex


The sentiment on the front along with the three leaves are from the 'Colorful Seasons' stamp set.
The sentiment has been stamped once in Cherry Cobbler.
Then stamped again in versamark and heat embossed in White Stampin' Emboss powder.
The trees are from the 'Lovely as a Tree' stamp set.
For the inside I used the sentiment from the 'Colorful Seasons' stamp set stamped in Cherry Cobbler and added a single die cut leaf.

If you enjoyed my project I would love it if you could vote for me over at Kylie's Blog...You can vote by clicking the blue VOTE button


All but 1 of the items used are available now in my store.
  • Colorful Seasons stamp (142726 pg 147) and Seasonal Layers thinlits (143751 pg 216)  will be available in my store from the 1st June 2017

For a full list of all other items please refer to the carousel below.

Don't forget the MAY Hostess Code if purchasing from me.

33EJUTN4


If you would like to be updated on special deals, hostess codes and even tutorials then sign up to my monthly news letter below.


Thank you so much for stopping by.
Any questions you may have please ask in comments below.
I always reply x

Thursday, 20 October 2016

International Blog Highlights - Friend - #GDP058 - Sketch Challenge


Hello and welcome back to my blog entry for today.

Today I am part of an International Project Highlights blog using current Stampin' Up!® Products. We have all created this gallery of projects for you to be inspired by! We would love it if you could visit every one of our blogs and see a close up of our projects. You can see the gallery below and this will be on every blog that you click on so you will never be lost.

I have also chosen to have a crack at this wonderful sketch challenge from Teneale Williams of the Global Design Project team.


Here is my card.

'FRIEND'

Inside View
#Awesomelyartistic #KOCreationscards #Handmade #Internationalbloghop #Stampinup #Smooshing

Items used for this card:

  • Emerald Envy A4 Card stock and Ink pad
  • Melon Mambo, Crushed Curry, Pear Pizzaz, Bermuda Bay and Peekaboo Peach  Ink Pads
  • Very Vanilla A4 Card stock
  • Stamp Set  - Awesomely Artistic
  • Water Colour Paper, Vellum A4 card stock 
  • Moroccan Designer Washi Tape 
  • Kraft 12 x 12 card stock 
  • Black Stazon ink pad and 
  • Wink of Stella in Clear.

Method:

  • My base has been cut to 10.5 x 14.5 cm then all the other layers have been cut accordingly.
  • I smooshed my inks onto my watercolour paper and then stamped my images once dry. 
  • When dry I cut this down to 8 x 8 cm and layered this the same as my base. I used Stampin' Dimensionals to place this onto my card base.
  • I also stamped the same flowers onto Vellum card stock and then fussy cut around them. 
  • I glued these over the top of the water color image, just to soften some of the intense colour.
  • I used Wink of Stella on the dragonflies wings.
  • the sentiment was stamped and placed last of all.

'Close Up'


#Awesomelyartistic #KOCreationscards #Handmade #Internationalbloghop #Stampinup #Smooshing

Thanks for visiting my blog today, there are so many amazing ideas and inspiration you don't want to miss. We know that you will love our gallery of projects made from Stampin' Up!® Demonstrators around the world!


 If you are looking for any of the items I used for this card, I have listed them for your convenience in the carousal below.


If you have any questions please feel free to ask in the comment area below, I always reply.