WELCOME
Today I have created a project using 4 yes FOUR
different stamp sets a die set + the GORGEOUS and NEW
Hexagonal Dynamic TIEF.
Thanks for coming to my blog today! We are being highlighted internationally by Kylie Bertucci and you are able to VOTE for my project. The top ten winners will get to be part of an international blog hop so please vote for my project. You can do that here - VOTE from the 29th Dec 2017
Our theme for this highlight is encouragement as we all need a kind word said to us to build us up.
Our theme for this highlight is encouragement as we all need a kind word said to us to build us up.
I wanted to make a card for the weeks challenge over at Global Design Project, as I saw their sketch and had this idea forming from it.
You will see 4 upcoming and soon to be released to the public items, from the *NEW* Occasions Catalogue used for this card project.
Showing how all of our products at Stampin' Up!® work so well together!
Here is the Sketch from GDP for the challenge #066.

and here is my card that I created using the sketch above.
"HONEY TO THE BEE"
 |
| #Hardwood #Touchesoftexture2of2 #Cooltreats #Dragonflydreams #Hexagonaldynamictief #KOCreationscards #Handmadecards #Australianmade #Giftoflove #Honeybees #Sweet |
CARD STOCK:
Crushed Curry, Basic Black, Chocolate Chip, Very Vanilla and Water Colour Paper.
STAMPS:
*Dragonfly Dreams* 142924, *Cool Treats* 142982, Touches of Texture 2 of 2, Hardwood.
EMBOSSING FOLDERS AND DIES:
Layering Ovals Framelits, *Hexagonal Dynamic Textured Impressions Embossing Folder* 143231
TOOLS:
Big Shot, Paper Piercing Tool, Sponge Brayer, Aqua Painter, Stampin Trimmer and Paper Snips.
INKS:
Crushed Curry, Chocolate Chip, Basic Grey, Crumb Cake and Stazon Jet Black.
EPHEMERA:
Bakers Twine Basic Black, 3 x *Falling in Love Embellishments* 142791
ADHESIVES:
Glue Dots, Tear and Tape, Fine-Tip Glue Pen and Stampin' Dimensionals.
SIDE VIEW
"HONEY TO THE BEE"
 |
| #Hardwood #Touchesoftexture2of2 #Cooltreats #Dragonflydreams #Hexagonaldynamictief #KOCreationscards #Handmadecards #Australianmade #Giftoflove #Honeybees #Sweet |
Making this card I realised just how versatile Stampin' Up! really is.
Everything works in partnership with nearly ANY product we have or can easily fit with another theme!!
And this new Occasions Catalogue WOW...If you haven't got your copy yet then PLEASE let me know. At the top of my page I have catalogue form requests...Just go there and fill out your details and I can send you a NEW Occasions Catalogue for FREE!
BASIC DIRECTIONS:
- Cut your card base from Crushed Curry A4 sheet at 10.5 cm length ways and then score and fold in half.
- Cut the two sets of layers to fit the front and inside, I just eyeballed them to get my sizing so I had a small edge for both.
- Stamp the front with the Hardwood Background Stamp 1 fully and one by only stamping half of the stamp up with ink and then gently dabbing away some ink with a baby wipe. Join both sets of layers together.
- Die cut the oval shape window from the layer that is fully inked and stamped up. Do this by using the second largest plain Oval Framelit die.
- Cut a frame for this window using Very Vanilla card stock and the Largest and the second largest oval Framelits.
- Die cut a piece of Crushed curry using the largest plain Oval Framelit Die.
- Run this oval shape through the Big Shot with the *Hexagonal Dynamic TIEF. (WOW I adore this thing!!!!)
- Sponge with the Sponge Brayer using Crushed Curry over the top of the embossed oval. Then using an Aqua Painter, colour the inside of the hexagonal (the small part) with Crushed Curry. Once coloured fill some random hollows with Glue from the Fine-tip Glue pen. Let dry!
- Once dry cut out some of the small inner hexagons. Back this embossed and coloured oval with a piece of Chocolate Chip.
- Using Water Colour Paper Stamp a Bumble bee from the *Dragonfly Dreams stamp set and 5 bees from the Touches Of Texture Stamp set in Stazon Black. Colour them using Crushed Curry Stampin' Write Marker or your Aqua Painter and Crushed Curry Ink.
- Fussy Cut them out!
- Cut a length of Basic Black Bakers Twine (enough to wrap around at least 4 times) Tie the *Falling in Love embellishment in place to the bakers twine.
- Stamp you sentiment using the sentiment from the *Cool Treats Stamp Set onto Very Vanilla, cut and adhere to back of the embellishment using a Glue Dot.
- Glue your embossed oval in place, then adhere the front layers with dimensionals to the base.
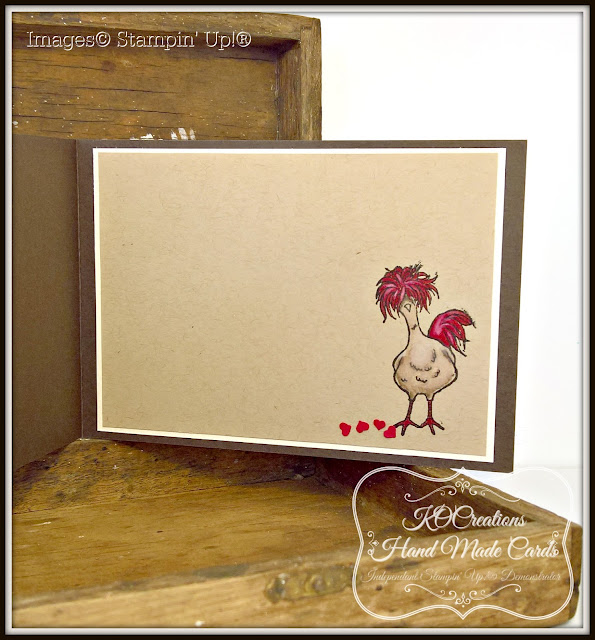
- Adhere the other two embellishments in place and then attach Bees in desired places with Glue dots remembering to add one inside :)
OPEN VIEW
"HONEY TO THE BEE"
 |
| #Hardwood #Touchesoftexture2of2 #Cooltreats #Dragonflydreams #Hexagonaldynamictief #KOCreationscards #Handmadecards #Australianmade #Giftoflove #Honeybees #Sweet |
Thanks for visiting my blog today make sure you head over to Kylie's blog - to VOTE for my project from 29th Dec 2017 . I would love to be chosen to do an international blog hop.
Any questions please ask!
Any questions please ask!
I do hope you enjoyed my project.
If you would like to purchase any of these products (EXCEPT THE NEW RELEASE THEY BECOME AVAILABLE ON THE 4TH JANUARY 2017)
Please click SHOP NOW!
Cant wait that few extra weeks or are interested in JOINING!?!
Then I would love to have you on my TEAM!
Just Click HERE to join my team and enjoy cheaper products and all the benefits that come with being a Stampin' Up!® Demonstrator
Thanks again and have a
WONDERFULLY SWEET DAY :)


