Friday, 16 December 2016

Honey to the Bee - #GDP066


WELCOME 

Today I have created a project using 4 yes FOUR
different stamp sets a die set + the GORGEOUS and NEW 
Hexagonal Dynamic TIEF.
Thanks for coming to my blog today! We are being highlighted internationally by Kylie Bertucci and you are able to VOTE for my project. The top ten winners will get to be part of an international blog hop so please vote for my project. You can do that here - VOTE from the 29th Dec 2017
Our theme for this highlight is encouragement as we all need a kind word said to us to build us up.

I wanted to make a card for the weeks challenge over at Global Design Project, as I saw their sketch and had this idea forming from it. 

You will see 4 upcoming and soon to be released to the public items, from the *NEW* Occasions Catalogue used for this card project.
Showing how all of our products at Stampin' Up!® work so well together!

Here is the Sketch from GDP for the challenge #066.


and here is my card that I created using the sketch above.


 "HONEY TO THE BEE"

#Hardwood #Touchesoftexture2of2 #Cooltreats #Dragonflydreams #Hexagonaldynamictief #KOCreationscards #Handmadecards #Australianmade #Giftoflove #Honeybees #Sweet

CARD STOCK:

Crushed Curry, Basic Black, Chocolate Chip, Very Vanilla and Water Colour Paper.

STAMPS:

*Dragonfly Dreams* 142924, *Cool Treats* 142982, Touches of Texture 2 of 2, Hardwood.

EMBOSSING FOLDERS AND DIES:

Layering Ovals Framelits, *Hexagonal Dynamic Textured Impressions Embossing Folder* 143231

TOOLS:

Big Shot, Paper Piercing Tool, Sponge Brayer, Aqua Painter, Stampin Trimmer and Paper Snips.

INKS:

Crushed Curry, Chocolate Chip, Basic Grey, Crumb Cake and Stazon Jet Black.

EPHEMERA:

Bakers Twine Basic Black, 3 x *Falling in Love Embellishments* 142791

ADHESIVES:

Glue Dots, Tear and Tape, Fine-Tip Glue Pen and Stampin' Dimensionals.


SIDE VIEW

"HONEY TO THE BEE"


#Hardwood #Touchesoftexture2of2 #Cooltreats #Dragonflydreams #Hexagonaldynamictief #KOCreationscards #Handmadecards #Australianmade #Giftoflove #Honeybees #Sweet

Making this card I realised just how versatile Stampin' Up! really is. 
Everything works in partnership with nearly ANY product we have or can easily fit with another theme!!
And this new Occasions Catalogue WOW...If you haven't got your copy yet then PLEASE let me know. At the top of my page I have catalogue form requests...Just go there and fill out your details and I can send you a NEW Occasions Catalogue for FREE!


BASIC DIRECTIONS:

  • Cut your card base from Crushed Curry A4 sheet at 10.5 cm  length ways and then score and fold in half. 
  • Cut the two sets of layers to fit the front and inside, I just eyeballed them to get my sizing so I had a small edge for both.
  • Stamp the front with the Hardwood Background Stamp 1 fully and one by only stamping half of the stamp up with ink and then gently dabbing away some ink with a baby wipe. Join both sets of layers together.
  • Die cut the oval shape window from the layer that is fully inked and stamped up. Do this by using the second largest plain Oval Framelit die. 
  • Cut a frame for this window using Very Vanilla card stock and the Largest and the second largest oval Framelits. 
  • Die cut a piece of Crushed curry using the largest plain Oval Framelit Die. 
  • Run this oval shape through the Big Shot with the *Hexagonal Dynamic TIEF. (WOW I adore this thing!!!!)
  • Sponge with the Sponge Brayer using Crushed Curry over the top of the embossed oval. Then using an Aqua Painter, colour the inside of the hexagonal (the small part) with Crushed Curry. Once coloured fill some random hollows with Glue from the Fine-tip Glue pen. Let dry! 
  • Once dry cut out some of the small inner hexagons. Back this embossed and coloured oval with a piece of Chocolate Chip.
  • Using Water Colour Paper Stamp a Bumble bee from the *Dragonfly Dreams stamp set and 5 bees from the Touches Of Texture Stamp set in Stazon Black. Colour them using Crushed Curry Stampin' Write Marker or your Aqua Painter and Crushed Curry Ink.
  • Fussy Cut them out!
  • Cut a length of Basic Black Bakers Twine (enough to wrap around at least 4 times) Tie the *Falling in Love embellishment in place to the bakers twine.
  • Stamp you sentiment using the sentiment from the *Cool Treats Stamp Set onto Very Vanilla, cut and adhere to back of the embellishment using a Glue Dot.
  • Glue your embossed oval in place, then adhere the front layers with dimensionals to the base.
  • Adhere the other two embellishments in place and then attach Bees in desired places with Glue dots remembering to add one inside :)

OPEN VIEW

"HONEY TO THE BEE"

#Hardwood #Touchesoftexture2of2 #Cooltreats #Dragonflydreams #Hexagonaldynamictief #KOCreationscards #Handmadecards #Australianmade #Giftoflove #Honeybees #Sweet

Thanks for visiting my blog today make sure you head over to Kylie's blog -  to VOTE for my project from 29th Dec 2017 . I would love to be chosen to do an international blog hop.

Any questions please ask!

I do hope you enjoyed my project.

If you would like to purchase any of these products (EXCEPT THE NEW RELEASE THEY BECOME AVAILABLE ON THE 4TH JANUARY 2017)
Please click SHOP NOW!

Cant wait that few extra weeks or are interested in JOINING!?!  
Then I would love to have you on my TEAM
Just Click HERE to join my team and enjoy cheaper products and all the benefits that come with being a Stampin' Up!® Demonstrator 


Thanks again and have a 
WONDERFULLY SWEET DAY :)


Wednesday, 14 December 2016

Billy's Magic Birthday Card


WELCOME

Today I will be sharing with you the special card I made for my son's 8th birthday. 
I will also be sharing a written tutorial for those interested in giving it a go for themselves :)

I REALLY must give thanks to Bruno Bertucci for giving me the inspiration for this card!!
#Magicbirthdaycard #Dinosaurs #Nobonesaboutit #KOCreationscards #Handmadecards #Australianmade #Cardmaking #Boysbirthday

Billy's Magic Birthday Card

Video showing movement of card


Now for the tutorial part 

:)


Card Stock DSP and Ephemera:

  1. Crumb Cake A4
  2. Very Vanilla for divider A4
  3. Chocolate Chip for scalloped frame and edging A4
  4. Fruit Stand DSP (Peekaboo Peach plants/pears 12 x 12 sheet)
  5. Acetate Window Sheet...for magic :)
  6. Burlap Ribbon

Stamp and Die/Framelt sets:

  1. No Bones About It
  2. Botanical Blooms
  3. Layering Squares Framelits
  4. Layering Circle Framelits or 1" Circle punch 
  5. Large Number Framelits

Inks Used:

  1. Pear Pizzazz
  2. Stazon Black
  3. Chocolate Chip
  4. Peekaboo Peach
  5. Versamark

Tools:

  1. Big Shot
  2. Paper Piercing Tool
  3. Staples and Stapler

Adhesives:

  1. Stampin Dimensionals
  2. Multi Purpose Liquid Glue
  3. Tear and Tape
  4. Glue Dots

Image 1


#Magicbirthdaycard #Dinosaurs #Nobonesaboutit #KOCreationscards #Handmadecards #Australianmade #Cardmaking #Boysbirthday

Alrighty then lets get started :)
  • Cut your Crumb Cake to 14 cm x 22cm
  • Score at 10 cm, 10.5 cm, 20.5cm, 21 cm, leaving a 1cm tab for closing box shell.
  • Cut down the Very Vanilla to 9.8 cm x 15.5 cm.
  • SCORE EACH FOLD LINE AS SHOWN IN IMAGE 1
  • Cut a piece of Chocolate chip card stock to 9.8 cm x 13.8 cm (use this to cut out scalloped frame)
  • Score at 14 cm and 14.5 cm leaving a 1 cm tab for joining to inside bottom of box.
  • Cut out a window using the second largest plain square.
  • Cut a scalloped frame from Chocolate chip using the same plain square and the largest scalloped square.

Image 2

#Magicbirthdaycard #Dinosaurs #Nobonesaboutit #KOCreationscards #Handmadecards #Australianmade #Cardmaking #Boysbirthday

  • Double check your Chocolate Chip for size on the front of theCrumb Cake where the window has been cut from and then cut the DSP sheet to leave a 2 mm edge all around.
  • Join together using glue, let dry then position this to the front of your Crumb Cake sheet where the window has been cut from. Turn over and mark where to cut the window from.
  • Cut out window 


Image 3


  • Add tear and tape in two rows to the 1 cm flaps of Crumb Cake and Very Vanilla as shown in Image 3 above.
  • Peel off the inside tape cover on Crumb Cake. Match up edges and using your bone folder firmly rub up and down length of inside the box, making sure it is all stuck in place before removing second strips cover using the Paper Piercing tool as an aid to pick up the edge.
  • Cut a small half circle at the top of the Very Vanilla using the 1" circle punch or layering Circle framelit.
  • Attach Very Vanilla using the same technique to the bottom of the completed box.
  • Using 1 glue dot place on the inside of the Crumb Cake to adhere the Very Vanilla  so the bottom of the box stays flat and solid.
NOW I MADE A CARD BACK FOR THIS BOX...It isn't shown in any images sorry :(
You can do it too! Just by using the same technique as the Very Vanilla piece above but cut so it adheres to the out side along the left side of the box! I also layered the same colours to the inside of my card and stamped a greeting and another dinosaur. 
  • Adhere DSP front to card front, after attaching back flap is so desired..

Image 4

#Magicbirthdaycard #Dinosaurs #Nobonesaboutit #KOCreationscards #Handmadecards #Australianmade #Cardmaking #Boysbirthday

NOW FOR THE FUN PART 

:)

  • Cut a piece of Very Vanilla to 9.8 cm x 12.5 cm and a piece of Acetate window sheet to match.
  • mark where your window is going to show and proceed to stamp your images in your chosen colours
  • Create a small tag to pull the piece up and down in your card. And make a Burlap covering.
  • Now when all ink is dry position the Acetate Window over the top and staple in place. 
  • Stamp your bones and leaf veins carefully over the top of your images, making sure you stamp in versamark before stazon.....This helps the colour stay on the acetate instead of lifting with your stamp.
  • All you need to do now is put the slider inside the small box, making sure the stamped Window Sheet is on top of the divider and the Very Vanilla sheet is behind.
VOILA!

You have a magic card of your own.
Decorate the front of your magic card how ever you desire xx

Open view of Magic Slider!

#Magicbirthdaycard #Dinosaurs #Nobonesaboutit #KOCreationscards #Handmadecards #Australianmade #Cardmaking #Boysbirthday
If you would like to purchase any of the items I used to create this project then look below. I have gathered them all for your convenience in the carousal below.


Thank you so much for stopping by :) I hope you enjoyed today's project.

If you have any questions then please don't hesitate to ask in comments below. 

I always reply :)


Sunday, 11 December 2016

Crazy Crafters Blog Hop with Lisa Curcio


Welcome back to my blog
I am taking part today in a blog hope with guest Lisa Curcio along with some other talented people from the Crazy Crafters Group. We are all choosing a project from Lisa's blog to CASE (Copy And Selective Edit)
 You will find a list at the end of my blog for you to follow. 
FYI you are currently here with me Kim Oliver.

 The project I have chosen to CASE is this one below

Spotlight with Lisa, Flurry of Wishes, www.lisasstampstudio.com


The elements chosen from this card is basically the layout design. I made 4 cards for my CASE and I will now share them with you.

I chose to use the gorgeous 'Sending Love' Suite from the upcoming Occasions catalogue for my projects.
Can't wait for these to be available to you all! You are going to have a ball going through the new catalogue and choosing your favourites.
Can't wait!?!  Then join my team HERE

'SENDING LOVE'

#Sendinglovesuite #KOCreationscards #Cardmaking #Handmade #Valentines #Sealedwithakiss #Australianmade #Sentwithlove #Stitchedshapesframelits

Isn't this such a gorgeous set!!! They make LOVE orientated cards so easy to create! They would be perfect for Valentines, Anniversaries and or Weddings...It's going to be quite versatile too as I noticed a couple of stamps would be perfect for little note cards.

Those lips look just just so luscious! I used that stamp on 3 out of my 4 cards hahaha

Okay I am now going to list below for you the items and tools used.

Items Used:
  • Sealed With Love Bundle - 144705
  • Sending Love Designer Series Paper Stack - 142733
  • Stitched Shapes Framlit Dies
  • Layering Circles Framelit Dies
  • Thick Whisper White Card Stock
  • Real Red Card Stock
Tools and Ink Used:
  • Big Shot
  • Clear Block D
  • Stazon Black
  • Real Red Stampin Pad
  • Versamark
  • Embossing Buddy
  • Clear embossing powder
  • Heat Tool
  • Stampin' Trimmer
Adhesives:
  • Stampin' Dimensionals
  • Multi Purpose Liquid Glue
  • Glue Dots
  • Tear and Tape
Embellishments:
  • Metallic Enamel Shapes
  • Real Red Stitched Satin Ribbon.

Front and Inside View

'Sealed WITH A Kiss' 1

#Sendinglovesuite #KOCreationscards #Cardmaking #Handmade #Valentines #Sealedwithakiss #Australianmade #Sentwithlove #Stitchedshapesframelits


 For each card I chose my paper before cutting it as shown in pictures. I chose DSP pieces that I could mix and match, so that some cards would be more red and others more white. I then used the contrasting colour for the layer beneath, red for mostly white DSP and white for mostly red DSP.


Front and Inside View

'Sealed WITH A Kiss' 2

#Sendinglovesuite #KOCreationscards #Cardmaking #Handmade #Valentines #Sealedwithakiss #Australianmade #Sentwithlove #Stitchedshapesframelits
With the card above I cut the 'Sealed WITH A Kiss' stamp into 3 sections so I could stamp the sentiment where I wanted it.
I can still use this stamp as a whole...which you can see in the image below.

Front and Inside View

'RED Sealed With A Kiss'

#Sendinglovesuite #KOCreationscards #Cardmaking #Handmade #Valentines #Sealedwithakiss #Australianmade #Sentwithlove #Stitchedshapesframelits

I try to carry through the theme from the front of each card to the inside, as I feel this adds a little something more for the recipients.

Front and Inside View

'Sent With Love'

#Sendinglovesuite #KOCreationscards #Cardmaking #Handmade #Valentines #Sealedwithakiss #Australianmade #Sentwithlove #Stitchedshapesframelits


Now if I am not the last on the list (If I am you have reached the end) and if not, then you are in for more gorgeous projects :)
Just click the name after mine to keep you moving through the hop. Otherwise TTFN and I hope you have enjoyed our blogs xx


Friday, 9 December 2016

Feather Together-Monochromatic - #CTC014

FEATHER TOGETHER!

WELCOME :)


Today's project was an order request that fitted in with a card challenge #CTC014 Monochromatic, 
so I was able to put it to double use and blog it,
and I do love sharing my projects, so this was the perfect excuse :)

With this card I am showcasing Dapper Denim and the Feather Together Stamp Set.
Being for a 40th I had to add a splash of silver to bling it up a bit.
 Also silver helps to reflect the colour back and it helps to add depth.
 I do hope Jessie doesn't mind hehehe.

"FEATHER TOGETHER"

#Feathertogether #KOCreationscards #Cardmaking #Handmade #Happybirthday #40thbirthday #fortiethbirthday #Largenumberframelits #Dapperdenim


monochromatic
mɒnə(ʊ)krəˈmatɪk/
adjective
  1. containing or using only one colour.
    "monochromatic light"


'SIDE VIEW'

#Feathertogether #KOCreationscards #Cardmaking #Handmade #Happybirthday #40thbirthday #fortiethbirthday #Largenumberframelits #Dapperdenim


The only ink colour used for this card was Dapper Denim! To get the shaded look I stamped off before stamping my image onto my card front. I also used the two step approach to the feather layers, which is easily achieved with the style of stamp that Feather Together is!
The numbers have been mounted using dimensional's onto two layered label die cuts in Silver Foil and Dapper Denim.


 'OPEN VIEW'

#Feathertogether #KOCreationscards #Cardmaking #Handmade #Happybirthday #40thbirthday #fortiethbirthday #Largenumberframelits #Dapperdenim


If you would like to purchase any of the items I used to create my project with, I have added them to the carousal below for your convenience.


Thank you so much for stopping by, If you have any questions please don't hesitate to ask in the comment section xx

Wednesday, 7 December 2016

Hey Chic! - #GDP065

HEY, CHIC! 

WELCOME :)

Today I am sharing another little sneak peek with you!
 A cute project created using a Sale-A-Bration item that will be available in January!

That item is a FREE STAMP SET!
Yes you heard right FREE!

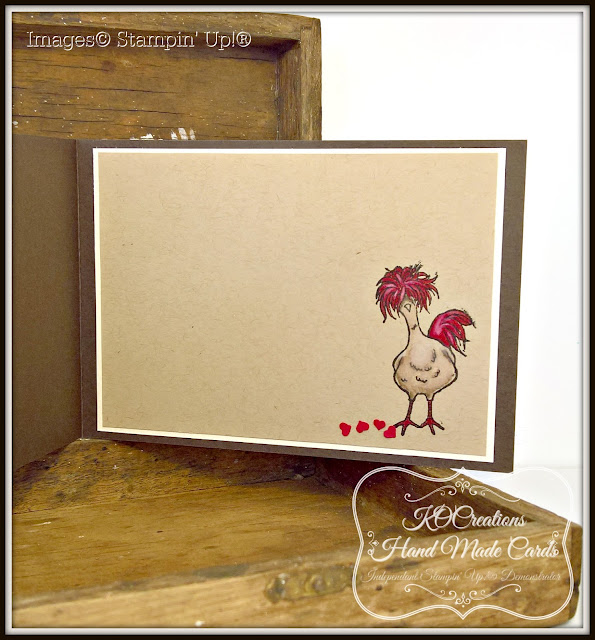
The stamp set I used is called 'Hey, Chic' from the Sale-A-Bration catty. 
When the new Occasions Catalogue is released to the general public (4th January - 31st May 2017)) you can get a FREE ITEM for every $90.00 spent during Sale-A-Bration time (4th January - 31st March) 

That's 1 free item from the SAB Catty for every $90.00!!!!! 
Amazing right!!!!

And if you can't wait that long to enjoy these benefits, you can become a demonstrator as part of my team (CLICK HERE) and enjoy these amazing offers now!


HEY, CHIC!


#Heychic #Wildaboutflowers #GDP065 #KOCreatiosncards #Handmade #Australianmade #Cardmaking


I have entered this card into Global Design Projects #GDP065 colour challenge

here is a picture of their chosen colours


For my card I used the following items:

STAMP SETS: Hey, Chic (143331) and Wild About Flowers (138728)
INKS/Markers: Early Espresso, Real Red,Crumb Cake, Stazon Black, Craft Whisper White, Wink of Stella Clear, with Real Read and Early Espresso Stampin' write markers
CARD STOCK: Early Espresso, Real Red, Very Vanilla and Crumb Cake.
FRAMELITS: Layering Circles and Stitched Shapes. 
PUNCHES: Confetti Hearts Border.
ADHESIVES: Fine Tip Glue Pen, Tear and Tape and Stampin' Dimensionals.
TOOLS: Big Shot, Paper Snips, Bone Folder, Clear Blocks D, F and G, Aqua Painter and a Stapler.


INSIDE VIEW


#Heychic #Wildaboutflowers #GDP065 #KOCreatiosncards #Handmade #Australianmade #Cardmaking


For your convenience I have made a carousal of items if you want to purchase anything I used to create with. Just click the picture of the  item required to shop with me.


Join!

It’s the best time of year to join Stampin’ Up! During Sale-A-Bration, you can become a demonstrator for just $169 AUD/$189 NZD and choose TWO additional stamp sets for your Starter Kit—any stamp set, any price! (Excludes project kits, bundles, and Sale-A-Bration sets.) Plus, the kit ships for free!
join_demo_Dec0116_US