Saturday, 29 October 2016

For You Anything - #CTC009

Welcome to my blog.
This is where I share my creations with you all. Sometimes I share tutorials and techniques here along with the cards I created using those techniques. Other times I enter my creations into challenges, then share them with you all here. 
Today is a day where I share with cards I entered into this weeks challenge over at www.jessieholton.com for her weekly Case This Card Challenge. This week we are CASEing Louise Jappe's card  pictured below.
I decided for my CASE I would use the colour scheme that she used for her card


Sweet Sugar Plum

Bermuda Bay
Melon Mambo
Dapper Denim (sentiment)
Blushing Bride

Pear Pizzazz


For my cards I chose the Hostess stamp set called 'Fabulous Flora' 
This stamp set becomes available to my hostess's as a choice to purchase when holding a workshop, or party. You can even hold your party online!


Without further ado I present to you my card entry for #CTC009 

'For You Anything'


#Fabulousflora #Touchesoftexture2of2 #Hostessgifts #KOCreationscards #Stampinup #Handmadecards #Cardmaking #CTC009

For this card I used a water colouring technique with Aqua Painters and Ink pads. I stamped my image onto thick Whisper White in Stazon Black then proceeded to water colour. I coloured the flower in Blushing Bride the melon Mambo. The stems and leaves have been coloured in Pear Pizzazz. The centre of the large flower has been coloured using Crushed Curry. For the back ground I used a mix of Bermuda Bay and Dapper Denim.
As the stamp indicates a messier style of painting, I let the colours bleed outside the lines in some areas. 
I added the sentiment onto a Sweet Sugarplum strip of card, which I then cut into a ribbon shape. This was adhered using Stampin' Dimensionals.
I left the card front as clean as possible, something new for me :)


'Inside View'


#Fabulousflora #Touchesoftexture2of2 #Hostessgifts #KOCreationscards #Stampinup #Handmadecards #Cardmaking #CTC009

I used the same process for the inside, making sure that I stamped the image of the paper. This leaves heaps of clean space for a personal sentiment/note to the recipient.


For my next card I used a technique I had used before, a long long time ago...
Meaning when I was in High School! 
OMG that was like, eons ago!?! 
Hang on ....counting the years.... Jeepers!!! OK I stopped counting at 30 :o hehehe
Anywho I digress. 

I was reminded again of this technique by Juan Ambiba and the colour stamping on dark card stock card, created a couple of days ago. You can see the card by clicking his name.
When I was my high school Art Class, we quite often used water colour pencils on dark/black paper to experiment and create with. 
And well, this was almost exactly the same, the only difference being a stamped image to colour in!!!

 So here is my card using the water colour pencils on dark card stock!

'For you Anything'

done on black card stock


#Fabulousflora #Touchesoftexture2of2 #Hostessgifts #KOCreationscards #Stampinup #Handmadecards #Cardmaking #CTC009

Just to ass some interest I used the bumble bee from Touches of Texture set 2 of 2 and after making a mask for the Fabulous Flora image I stamped another floral image. The masking enables me to make the last image appear as if behind the first. 
For the inside of this card,  I stamped as per a normal image on white paper, but coloured with the pencils to keep the same feel and texture.
On the front image, I used clear Wink of Stella on the main flowers and the Bumble Bee after colouring with my pencils.
The sentiment has been created using White emboss powder.
I also added 3 Rhinestone jewels for some added sparkle.

 'Inside View'
#Fabulousflora #Touchesoftexture2of2 #Hostessgifts #KOCreationscards #Stampinup #Handmadecards #Cardmaking #CTC009


I thought I would take a picture of both cards together

#Fabulousflora #Touchesoftexture2of2 #Hostessgifts #KOCreationscards #Stampinup #Handmadecards #Cardmaking #CTC009

The card stock used for the card on the left is: Sweet Sugarplum, Whisper White and a piece of floral Blooms and Bliss DSP in Dapper Denim and Mint Macaron.

For the Dark card  I used : Sweet Sugar Plum Whisper White and Basic Black.

If you would like to purchase any of the items I used to create this card, I have listed them for your convenience in the carousal below.


Thank you so very much for stopping by to see my creations. If you have any question please ask in comments below. I always reply!

Wednesday, 26 October 2016

Seaside Shore - Here's Hoping Your Day Goes Swimmingly - #GDP059

 Welcome !
Today  am sharing some cards I made using the stamp set 'Seaside Shore'.
I have had this set for a little while now, just waiting for the right opportunity to showcase it.
 I am entering one of these cards into the weekly challenge at Global Design Project #GDP059
There theme this week is Animals/Pets.


I used the 'Smooshing' technique (Click HERE to see more)  for the 2 cards at the back, pictured below. 

#Seasideshore #KOCreationcards #Australianmade #Inspiredbynature #Cardmaking #Smooshingtechnique #Hopingyourdaygoesswimmimgly

Before colouring of any kind began, I stamped all of my images in Stazon black ink, where I wanted them to be. 
I then masked them all using MOLOTOW art masking liquid. You must leave this to dry before applying any colouring.
When this had dried I then proceeded to colour the backgrounds in my chosen colours. 

'Fish Bowl'


This card below is the one I am entering into #GDP059
#Seasideshore #KOCreationcards #Australianmade #Inspiredbynature #Cardmaking #Smooshingtechnique #Hopingyourdaygoesswimmimgly

For the fish bowl, I used the largest circle Layering framelit and drew around one quarter creating the side of the bowl, moving it over just little, I drew the opposite side. I hand drew the base and the top trying to give the same effect as if stamped. 
For the back ground of the bowl, I used Aqua painters, with and a mix of Island Indigo, Bermuda Bay, Tip Top Taupe, Crushed Curry and Pool Party stamp pads. The sentiment has been stamped in Emerald Envy and embellished with Emerald Envy Bakers Twine and topped with a silver enamel shape..... The shadow was created using Smoky Slate stamp pad and Aqua Painter.


 'Front View of FISH BOWL'


#Seasideshore #KOCreationcards #Australianmade #Inspiredbynature #Cardmaking #Smooshingtechnique #Hopingyourdaygoesswimmimgly

For the next 2 card images I used the Smooshing technique for the background (Clike HERE to see the tutorial)


 'Swimming Free'


#Seasideshore #KOCreationcards #Australianmade #Inspiredbynature #Cardmaking #Smooshingtechnique #Hopingyourdaygoesswimmimgly

Once all water colouring had completely dried (I left mine overnight) I removed the Molotow masking fluid.
I then proceeded to colour the images accordingly. 
For the 3 fish images above and below I used a mix of Daffodil Delight, Real Red, Pool Party with the Clear Wink of Stella. The single fish was created using Bermuda Bay, Real red and Wink of Stella. The weeds were coloured using Pear Pizzazz and Garden Green. The bubbles were embellished with Silver Metallic Enamel Shapes.

'Side view of Swimming Free' 

#Seasideshore #KOCreationcards #Australianmade #Inspiredbynature #Cardmaking #Smooshingtechnique #Hopingyourdaygoesswimmimgly

'Front View of Free Swimming'


#Seasideshore #KOCreationcards #Australianmade #Inspiredbynature #Cardmaking #Smooshingtechnique #Hopingyourdaygoesswimmimgly
The colours used for the backgrounds for these two images are the same as above also using the Smooshing technique. For the 3 fish images I used the Gold Wink of Stella and for the little single fish I used the same as the precious card. I added some small pearls under the sea weed next to the shells for this card.

'Side View of Free Swimming'

#Seasideshore #KOCreationcards #Australianmade #Inspiredbynature #Cardmaking #Smooshingtechnique #Hopingyourdaygoesswimmimgly

If you are looking to purchase any of the items I used to create these cards, I have added them all to the carousal below.


Monday, 24 October 2016

Cards using Bokeh effect Backgrounds.


Welcome back to my blog

Today I am sharing with you something I tried for the first time yesterday. 
It is the Bokeh Effect. Something used by photographers regularly and can be achieved with ink on paper by layering colours and circles.
I have made a little tutorial for you , so you can also try this if you are feeling inspired.
As I have made a tutorial I haven't added much in the way of descriptions.


I have entered one of these cards in to Jessie Holtons #CTC008 weekly challenge
(Orange colours 'Happy Birthday')


Here is a group shot of all the cards I made using my Bokeh backgrounds


#Bokeheffect #Inspiredbynature #KOCreationscards #Helpingmegrow #Watercolorbutterflys #Helloyouthinlits  #Fabulousfoil

I used two different colour tones for each Bokeh effect and used those same colours for the cards bases and layers.


'Hello You'

#Bokeheffect #Inspiredbynature #KOCreationscards #Helpingmegrow #Watercolorbutterflys #Helloyouthinlits #Fabulousfoil

For the Bokeh in orange colour tones I used:

  • Watermelon Wonder
  • Peekaboo Peach
  • Crushed Curry
  • and Blushing Bride

'The Little Moments With You'


#Bokeheffect #Inspiredbynature #KOCreationscards #Helpingmegrow #Watercolorwings #Helloyouthinlits #Fabulousfoil

'Happy Birthday'


My card entry for #CTC008

#Bokeheffect #Inspiredbynature #KOCreationscards #Helpingmegrow #Watercolorwings #Helloyouthinlits #Fabulousfoil

For the Purple colours I used:

  • Elegant Eggplant
  • Wisteria Wonder
  • Blushing Bride
  • and Sweet Sugarplum

'Hello'


#Bokeheffect #Inspiredbynature #KOCreationscards #Helpingmegrow #Watercolorwings #Helloyouthinlits #Fabulousfoil


'Happy Birthday'

in Elegant Eggplant and Wisteria Wonder

#Bokeheffect #Inspiredbynature #KOCreationscards #Helpingmegrow #Watercolorwings #Helloyouthinlits #Fabulousfoil


'The Little Moments Matter'

In Elegant Eggplant and Wisteria Wonder


#Bokeheffect #Inspiredbynature #KOCreationscards #Helpingmegrow #Watercolorwings #Helloyouthinlits #Fabulousfoil


Bokeh Tutorial


You will notice I added a yellow to the mix during the clip....this is Crushed Curry..sorry forgot to add that to Video :)
Oh and those silver words have been die cut using the Hello You thinlits :) hehehehe total space out during filmin/g 


Sunday, 23 October 2016

Crazy Crafters Blog Hop with Bibi Cameron


Welcome to the CRAZY CRAFTER'S BLOG HOP with Bibi Cameron
Today all of our crazy hoppers have chosen a card from the super talented  Bibi's designs, a card that has inspired us in some way,  and we are CASEing it. 

I have chosen this gorgeous design below.

www.bibicameron.co.uk
  Isn't this just the cutest set of baby cards ever!


For my card design, I knew I needed it to be movable, so I incorporated a slider partition into Bibi's design, keeping the 3 round windows for a similar peekaboo look.


THE TUTORIAL VIDEO IS AT THE END OF THIS BLOG :-)

Currently you are here with me (Kim Oliver) you will find a list with names at the bottom of the page after the tutorial video, so you can keep moving through the hop and viewing all of the other gorgeous designs.

 'FOR CASSIDY'

#Foxyfriends #KOCreationscards #Handmadecards #Australianmade #Peekaboocard #Happybirthday #Giftoflove

As one of my nieces is having a birthday soon and she just ADORES foxes, I thought this would be the perfect time to whip out my Foxy Friends stamp set, punch and gorgeous DSP


'FULL OPEN VIEW'

#Foxyfriends #KOCreationscards #Handmadecards #Australianmade #Peekaboocard #Happybirthday #Giftoflove

'TOP VIEW'

#Foxyfriends #KOCreationscards #Handmadecards #Australianmade #Peekaboocard #Happybirthday #Giftoflove


 'FRONT VIEW'

#Foxyfriends #KOCreationscards #Handmadecards #Australianmade #Peekaboocard #Happybirthday #Giftoflove

To keep hopping with us please click the name after mine.


'Tutorial Video'


If you would like to purchase any of the items I used to create this card, I have put them all together for you below in the carousal


Thank you so much for visiting my blog today. 

If you have any questions, please ask in comments below. 

I always reply!


Thursday, 20 October 2016

International Blog Highlights - Friend - #GDP058 - Sketch Challenge


Hello and welcome back to my blog entry for today.

Today I am part of an International Project Highlights blog using current Stampin' Up!® Products. We have all created this gallery of projects for you to be inspired by! We would love it if you could visit every one of our blogs and see a close up of our projects. You can see the gallery below and this will be on every blog that you click on so you will never be lost.

I have also chosen to have a crack at this wonderful sketch challenge from Teneale Williams of the Global Design Project team.


Here is my card.

'FRIEND'

Inside View
#Awesomelyartistic #KOCreationscards #Handmade #Internationalbloghop #Stampinup #Smooshing

Items used for this card:

  • Emerald Envy A4 Card stock and Ink pad
  • Melon Mambo, Crushed Curry, Pear Pizzaz, Bermuda Bay and Peekaboo Peach  Ink Pads
  • Very Vanilla A4 Card stock
  • Stamp Set  - Awesomely Artistic
  • Water Colour Paper, Vellum A4 card stock 
  • Moroccan Designer Washi Tape 
  • Kraft 12 x 12 card stock 
  • Black Stazon ink pad and 
  • Wink of Stella in Clear.

Method:

  • My base has been cut to 10.5 x 14.5 cm then all the other layers have been cut accordingly.
  • I smooshed my inks onto my watercolour paper and then stamped my images once dry. 
  • When dry I cut this down to 8 x 8 cm and layered this the same as my base. I used Stampin' Dimensionals to place this onto my card base.
  • I also stamped the same flowers onto Vellum card stock and then fussy cut around them. 
  • I glued these over the top of the water color image, just to soften some of the intense colour.
  • I used Wink of Stella on the dragonflies wings.
  • the sentiment was stamped and placed last of all.

'Close Up'


#Awesomelyartistic #KOCreationscards #Handmade #Internationalbloghop #Stampinup #Smooshing

Thanks for visiting my blog today, there are so many amazing ideas and inspiration you don't want to miss. We know that you will love our gallery of projects made from Stampin' Up!® Demonstrators around the world!


 If you are looking for any of the items I used for this card, I have listed them for your convenience in the carousal below.


If you have any questions please feel free to ask in the comment area below, I always reply.


Wednesday, 12 October 2016

'For You' A Colour Challenge from #GDP057

FOR YOU


Welcome to my blog once again.
Today I have created a card using the Global Design Teams colour challenge (below)

Rich Razzleberry - Mint Macaron - Blushing Bride

 I took a couple of days to think about these colours...they reminded me of a more Vintage /Victorian era.
So I went to my cave and had a play this afternoon and came up with this gorgeous design. 

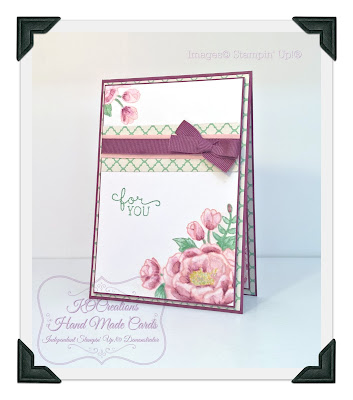
'FOR YOU'

#Birthdayblooms #KOCreationscards #Handmadecards #Oldworld #Yearsgoneby #Stampinup #Watercolouring


I am not sure if it is the colours, the roses or even the ribbon!?! But when I finally put them all together this card certainly has an old world feel to it. 
What do you think?

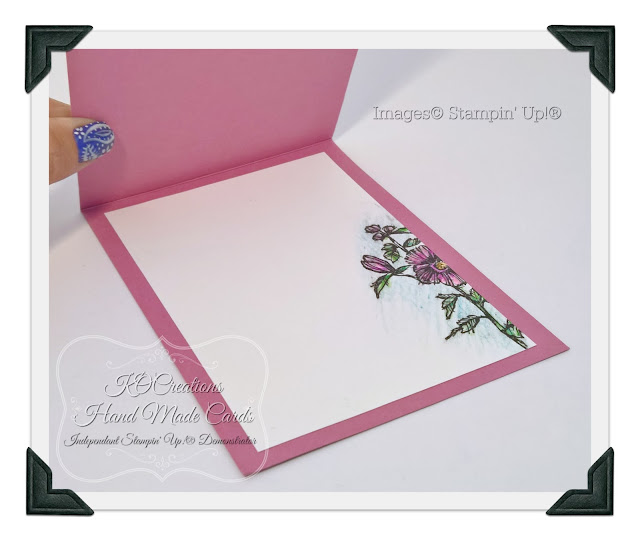
'INSIDE VIEW'

#Birthdayblooms #KOCreationscards #Handmadecards #Oldworld #Yearsgoneby #Stampinup #Watercolouring

This card is very basic, but I do love the effect.
I started with a Rich Razzleberry card base cut at 10.5 c 15 cm. I then cut to fit the Rich Razzleberry DSP from the Petals and Paisleys DSP which has lovely Mint Macaron design on the reverse side and another Rich Razzleberry layer, all to go under the water colour paper.

I stamped my images using the Roses from the Birthday Blooms stamp set. First in Blushing Bride and then in Mint Macaron, wiping the ink of with a baby wipe where I didn't require either colour. 
I then proceeded to water colour the stamped image with my inks and Aqua Painters. 
I used the Rich Razzleberry ribbon from the Trio pack that co-ordinates with the Petals and Paisley DSP and layered that with a strip of the Mint Macaron DSP. 
I added a bow to finish it all off.
The sentiment is from the Birthday Blooms stamp set

 'FRONT VIEW'

#Birthdayblooms #KOCreationscards #Handmadecards #Oldworld #Yearsgoneby #Stampinup #Watercolouring

I hope you have enjoyed my card today.

If you would like to purchase any of the items I used to make my card, I have listed them for you in the carousal below for your convenience.


Don't forget that if you buy three (3) DSP packs you will get one (1) DSP pack for FREE! 
ALL FOR THE MONTH OF OCTOBER!

Click HERE to shop for your DSP now

THANK YOU FOR STOPPING BY

If you have an y questions please feel free to ask in comments below. 
I always reply :)


Sunday, 9 October 2016

#CTC006 with Jessie Holton - 'HELLO'


WELCOME BACK

Today I am CASEing one of my own cards for this weeks Case This Card challenge.


This card is from my #CTC005 blog Water Colours


The elements I chose from my last card were 
  1. the Water Coloring
  2. the Layers 
  3. the Colours
  4. the use of Vellum

I wanted a totally different card this time and I think I have accomplished that with 'HELLO'

I wanted a card that could be replicated and modified, but be slightly different each time it was replicated.
Sound mysterious?
 Well for those going to 'On Stage' in Brisbane, all will be revealed then.

Sooooo

With out further ado,

'HELLO'


#Butterflybasics #Gorgeousgrunge #Hello #KOCreationscards #Australianmade #Handmade #Bittybutterfly #Onstagebrisbane  #Labeleralphabet


To Make 'HELLO'
  • Choose a neutral card base. Fold an A4 in half at 15 cm then trim at 10.5 cm.
  • Then choose a colour you want to feature. I chose Peekaboo Peach. Trim so as to leave a small edge of the base showing underneath.
  • Cut a piece of Crumb Cake to 7 x 13 cm
  • Stamp the image you want onto Very Vanilla and Water Colour using Aqua Painters..... then trim to fit your card and placement.
* Don't let anyone tell you that you can't water colour on normal cardstock. the trick is to be QUICK!
* Now this does take practice, and remember being water colour, it is very forgiving. No one expects you to remain inside the lines!
  • Distress the edges of your trimmed image and your main colour card.
  • Layer them as pictured. I have placed Stampin' Dimensionals under the Peekaboo Peach.


SIDE VIEW

         
#Butterflybasics #Gorgeousgrunge #Hello #KOCreationscards #Australianmade #Handmade #Bittybutterfly #Onstagebrisbane #Labeleralphabet

  • Under my distressed image I have added small strips of burlap ribbon. 
  • I have also added a length of Linen Thread around the edge of the Crumb Cake and tied my sentiment to this.
  • At the bottom I have stapled a small doubled over section of Very Vanilla lace trim


OPEN VIEW

#Butterflybasics #Gorgeousgrunge #Hello #KOCreationscards #Australianmade #Handmade #Bittybutterfly #Onstagebrisbane #Labeleralphabet

I do hope you have enjoyed this card creation today. 
I would love to see an entry of yours in Jessies #CTC006 this week, or even next week if you can't make it to this one. Entries close Tuesday evenings around 6pm.


If you would like to purchase any of the items I used to create my card, I have listed them for your convenience in the carousal below.


Thank you so much for visiting with me today.
If you have any questions please don't hesitate to ask in comments below. I always reply!


Crazy Crafters Blog Hop with Julie Davisdon


Hi all :)
Welcome to our Blog Hop.
This week we are Hopping with Julie Davison.

I was pouring through Julie's Blog and come across this card (below) almost straight away! And as I am sooooo in love with the Paisley's right now, I knew I just HAD to create my own version of this Peekaboo card.


AND

 HERE IT IS!

Paisley Love!

#Paisleysandposies   #Petalsandpaisleysdsp #Paisleysframelits #KOCreationscards #Stampinup #Handmade


For this card it was easier to show a picture and then try to explain the instructions.

  The red card base picture came from www.frommycraftroom.blogspot.com.au 
         When scored and folded it all fits together to look like this.  I couldn't find a name or blog for this picture, sorry.


BASIC INSTRUCTIONS AND *TIPS:

  •  You will require 3 pieces of Card stock in your chosen colour, cut to the measurements in the picture above. 
Then score them as follows:
  1. The inside/middle card is scored @ exactly half way. 
  2. The front is scored @ 7.5 cm. 
  3. The back is scored @ 1.cm, this is used as a hinge to attach to the inside/middle card.
  • You will need three pieces of DSP or your own designed background papers. All cut to fit how ever you desire, either with edges or not. I have edge of my copper layer and my Rich Razzleberry card base showing.
  • When you have all of your pieces, *mark the front of your card in at 1 cm from the opening edge down the length of the card.....then *mark at 6.5 cm in from your first mark.  
TIP * Your window has to be inside those two marks, so that the movable card stock shows no edges inside the window frames etc.
  • Attach you DSP to your card bases.  
 *If using layers (like me) PLEASE don't put your layers together until all windows have been cut! I tried this and found that it was too much for the big shot and squished my papers out of shape. use steps below . I ruined a crap load of paper from trying to put my layers together and onto my card bases!
  1. Cut your first window from your front piece of DSP. 
  2. Then laying your DSP over the top and holding in place with a tiny bit of adhesive snail, draw with a pencil around the inside marking where you will make the next window, precisely!
*I found that having a border around your windows really helps to give the card a more finished look.
  • If stamping your images for the windows, place your card pieces under the back page in their positions. Stamp straight through the window, that way you know it will be EXACTLY where you want it to be. 
  • Put all of your pieces together and voila! You have your peekaboo card


INSIDE VIEW 1

Partially open
#Paisleysandposies   #Petalsandpaisleysdsp #Paisleysframelits #KOCreationscards #Stampinup #Handmade #Copper #cardmaking


  • The windows for my peekaboo card have been cut using the Paisley Framelits.
  • The DSP I chose is from the Petals and Pailseys DSP  in Rich Razzleberry and Very Vanilla with Copper dots.
  • I cut 3 small strips of the Rich Razzlebrry DSP and left just enough room for a strip of tear and tape to join that DSP to the Copper dots DSP.
  • I layered these onto a pre-cut copper foil sheet.
  • You can see that for the first set inside my windows, I have heat embossed using the White embossing powder, straight onto the Rich Razzleberry.

INSIDE VIEW 2

Fully open
#Paisleysandposies   #Petalsandpaisleysdsp #Paisleysframelits #KOCreationscards #Stampinup #Handmade #Copper #cardmaking


  • And here for the second set of I have used a die cut copper sheet from the Paisley Framelits set and the Copper embossing powder.
  • To finish this card I added a long piece of Very Vanilla ribbon tied with a bow. This bow wraps around the inside of the card too, as you can see above.
  •  I also added my sentiment and a die cut copper shape with Metallic thread in copper..


Front View

#Paisleysandposies   #Petalsandpaisleysdsp #Paisleysframelits #KOCreationscards #Stampinup #Handmade #Copper #cardmaking

I hope you enjoyed my card today.

Don't forget to keep hopping along to see more gorgeous creations all based upon Julie's fab designs. Currently you here with me (Kim Oliver) to keep hopping just click the next name under mine.


If you would like to purchase any of the items I used to create my card, I have added them to the carousal (below) for your convenience.


Thank for for stopping by :)

                         If you have any questions please ask in comments below, I always reply!


Friday, 7 October 2016

'You Make Me Happy' #GDP056

Welcome


Today I am sharing a card created CASEing Bibi Cameron
for this weeks challenge over at Global Design Project #GDP056

Here is Bibi's Card

The elements I chose to CASE from Bibi's card were the colours and the little corner embellishment. Mainly because I don't have the stamp set :)

I am also adding this card to Kylies weekly Blog Highlights.
PLEASE Click HERE to vote

Here is my card :)

'YOU MAKE ME SO HAPPY'

#Prettykitty #Ghoulishgrunge #Youmakemehappy #KOCreationscards #Handmade #Stampinup #GDP056

Items used to 'You Make Me Happy':

  • Card stock used Flirty Flamingo cut to 10.5 x 15 cm and Thick Whisper White with Flirty Flamingo layers and the In colours DSP in Flirty Flamingo
  • Inks used Flirty Flamingo,Peekaboo Peach, Island Indigo, Bermuda Bay, Emerald Envy, Craft Whisper White and Versamark.
  • Stamp sets used were Pretty Kitty and Ghoulish Grunge
  • Tools used were Aqua painter, Clear blocks, Stampin' Dimensionals, Fine-Tip Glue pen, Embossing buddy, White Stampin Eboss powder, Heat Tool, thick Whisper White bakers twine, Delicate White Doily  and Tear and Tape.

INSIDE VIEW

#Prettykitty #Ghoulishgrunge #Youmakemehappy #KOCreationscards #Handmade #Stampinup #GDP056

Method:

  • Trim card stock to size leaving an small edge visible around your layers. The top Layer being Thick Whisper White.
  • Before layering all pieces together, dust the top layer with the embossing buddy then Stamp the images  you choose for the white resist emboss technique in Versamark. Sprinkle the stamped versamark image with the embossing powder and remove excess  by sharply tapping the back of the paper with your finger nail. Heat the image with your heat tool.
  • Stamp selected images from the Pretty Kitty stamp set in stazon black ink then proceed to colour in your chosen colours using the inks and Aqua Painters.
  • Once the front layer has been coloured you can then start on the inside images.
  • Join your top layer onto the Flirty Flamingo layer, then join that onto the Whisper White layer  using Tear and Tape. When all done put all of these layers onto the card base using Stampin' Dimensionals.
  • Add you corner embellishments using the Fine- Tip Glue Pen. Then add the sentiment using Stampin' Dimensionals.

SIDE VIEW

#Prettykitty #Ghoulishgrunge #Youmakemehappy #KOCreationscards #Handmade #Stampinup #GDP056

I hope you enjoyed my card today. 
If you would like to purchase any of the items I used to create this card. I have added them all to this carousal below for your convenience.


If you have any questions please don't hesitate to ask in comments below. I always reply.